
Uploading Photos
Your uploaded photos are the most important input for your final headshots. Use recent, clear images where your face is visible and well lit.
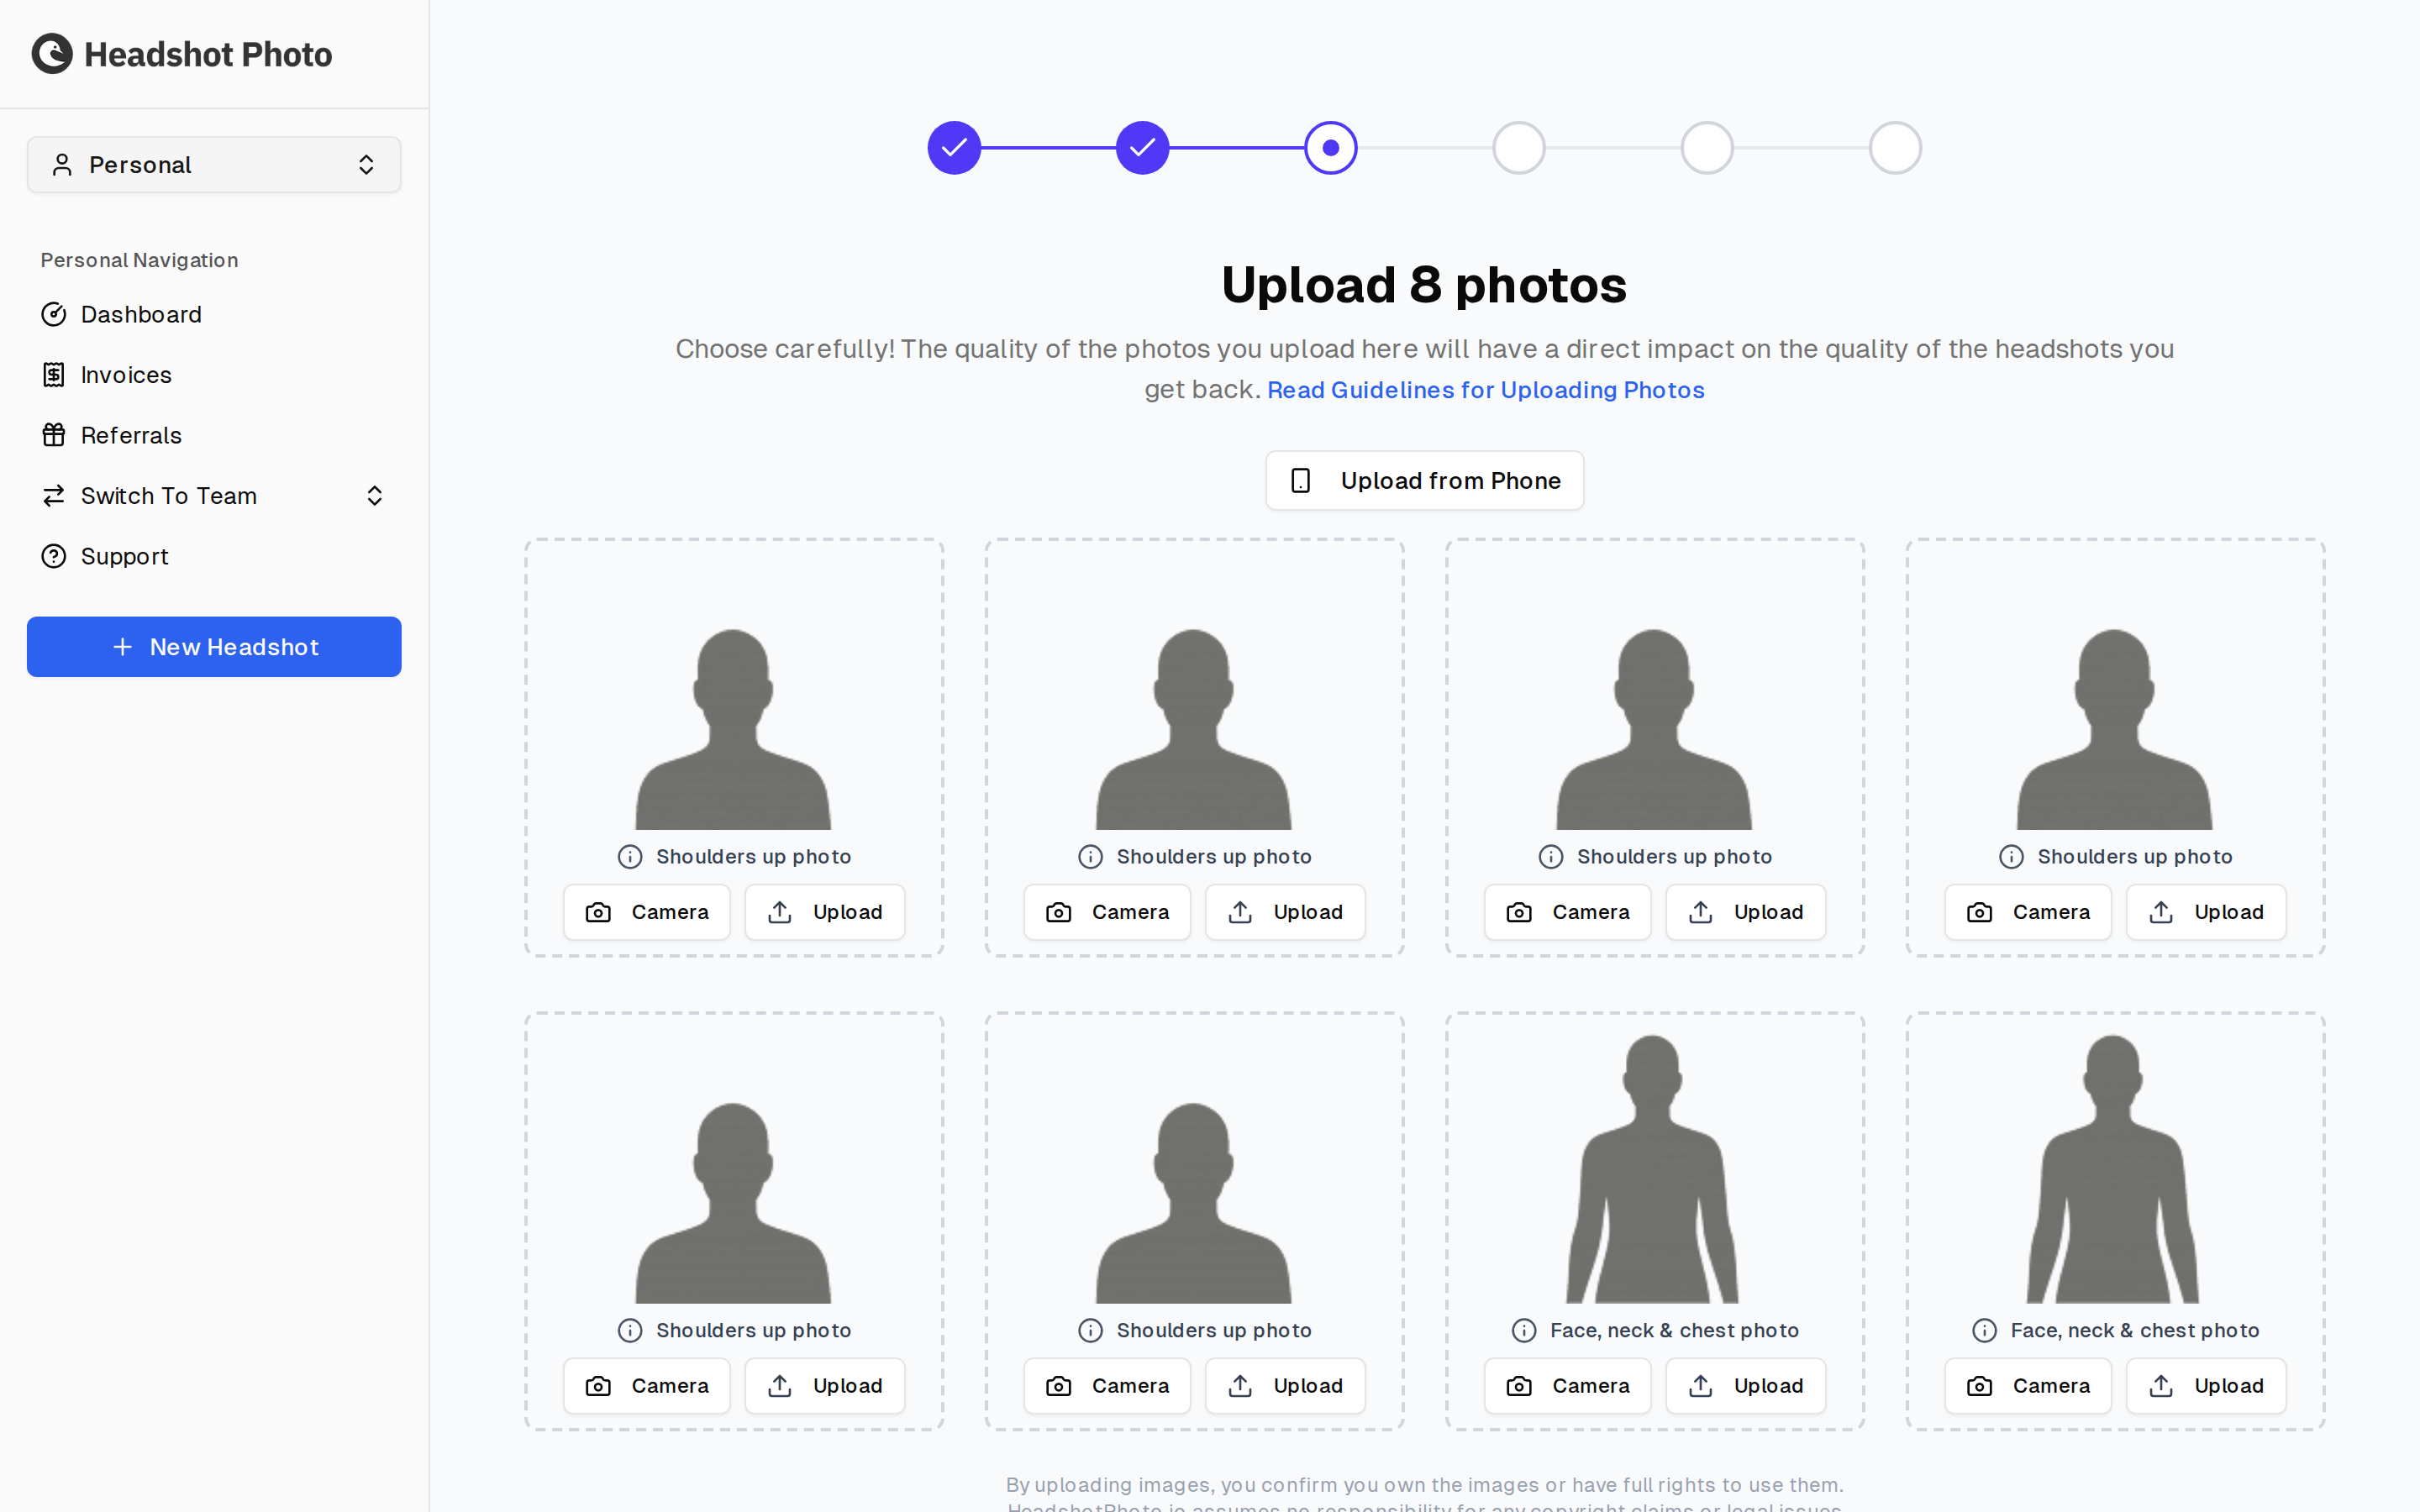
Photo Count
Individual sessions use 8 training photos by default:
- Positions 1-6 should be close-up face photos
- Positions 7-8 should show your face, neck, and chest
Minimum Quality Requirements
Each uploaded photo is checked before it can be used.
| Requirement | What It Means |
|---|---|
| Resolution | The image must be at least 512px on both width and height |
| Face size | Your face must be close enough to fill the frame clearly |
| One person | Only one person should appear in the image |
| Visible face | Your face should not be blocked, hidden, or heavily shadowed |
| No sunglasses | Remove sunglasses and avoid eyewear that hides your eyes |
| Torso visibility | Body-photo slots must show chest and shoulders |
Good Upload Photos
Use photos that are:
- Sharp, not blurry
- Bright, even lighting
- Face looking toward the camera
- Recent appearance, hairstyle, and facial hair
- Different angles and expressions
- Simple background when possible
Photos to Avoid
Avoid photos where:
- The image is too small or low resolution
- You are far away from the camera
- Your face is cropped, covered, or turned away
- Multiple people are visible
- Sunglasses cover the eyes
- Heavy filters change your real appearance
Uploading From Your Phone
Your best photos are usually already on your phone. Rather than emailing them to yourself, use the QR code to open the upload page directly on the handset.
Opening the QR Code
Upload from Phone sits at the top of the upload page, above the photo slots. It appears on desktop only — on a phone you are already where the QR code would send you, so the button is hidden.
Scanning the code opens the upload page on your phone and signs you in automatically. There is no password to type and no separate mobile login.
The Code Expires After 10 Minutes
The dialog counts down from 10:00. Scan it well before the timer runs out.
If it does expire, the code is replaced by a QR code expired panel with a Generate New QR Code button. Click it and a fresh code appears with a full ten minutes — you do not need to close the dialog, reload the page, or start the session again.
Photos Appear on the Desktop by Themselves
Leave the desktop page open while you upload from the phone. It checks for new photos every few seconds and fills the slots in as they arrive — there is no refresh button to press and no need to re-scan. When the last slot is filled, continue on either device.
Next Steps
Once all photos are uploaded and processed, continue to Choosing Styles.