
Team Settings
Team settings control how your organization uses HeadshotPhoto.io. Everything is grouped into five tabs, so you can go straight to the area you need instead of scrolling one long page.
Accessing Settings
- Go to your Team Dashboard
- Click Settings in the sidebar
- The General tab opens first
The five tabs
| Tab | What it holds |
|---|---|
| General | Organization details — team name, website, API key |
| Branding | Branding settings, custom background, logo on clothing |
| Notification preferences and reply addresses | |
| Headshots | Six rules covering photos, sizes, access, and billing |
| Admins | Invite and manage team administrators |
Your selection is not remembered between visits — Settings always opens on General.
General
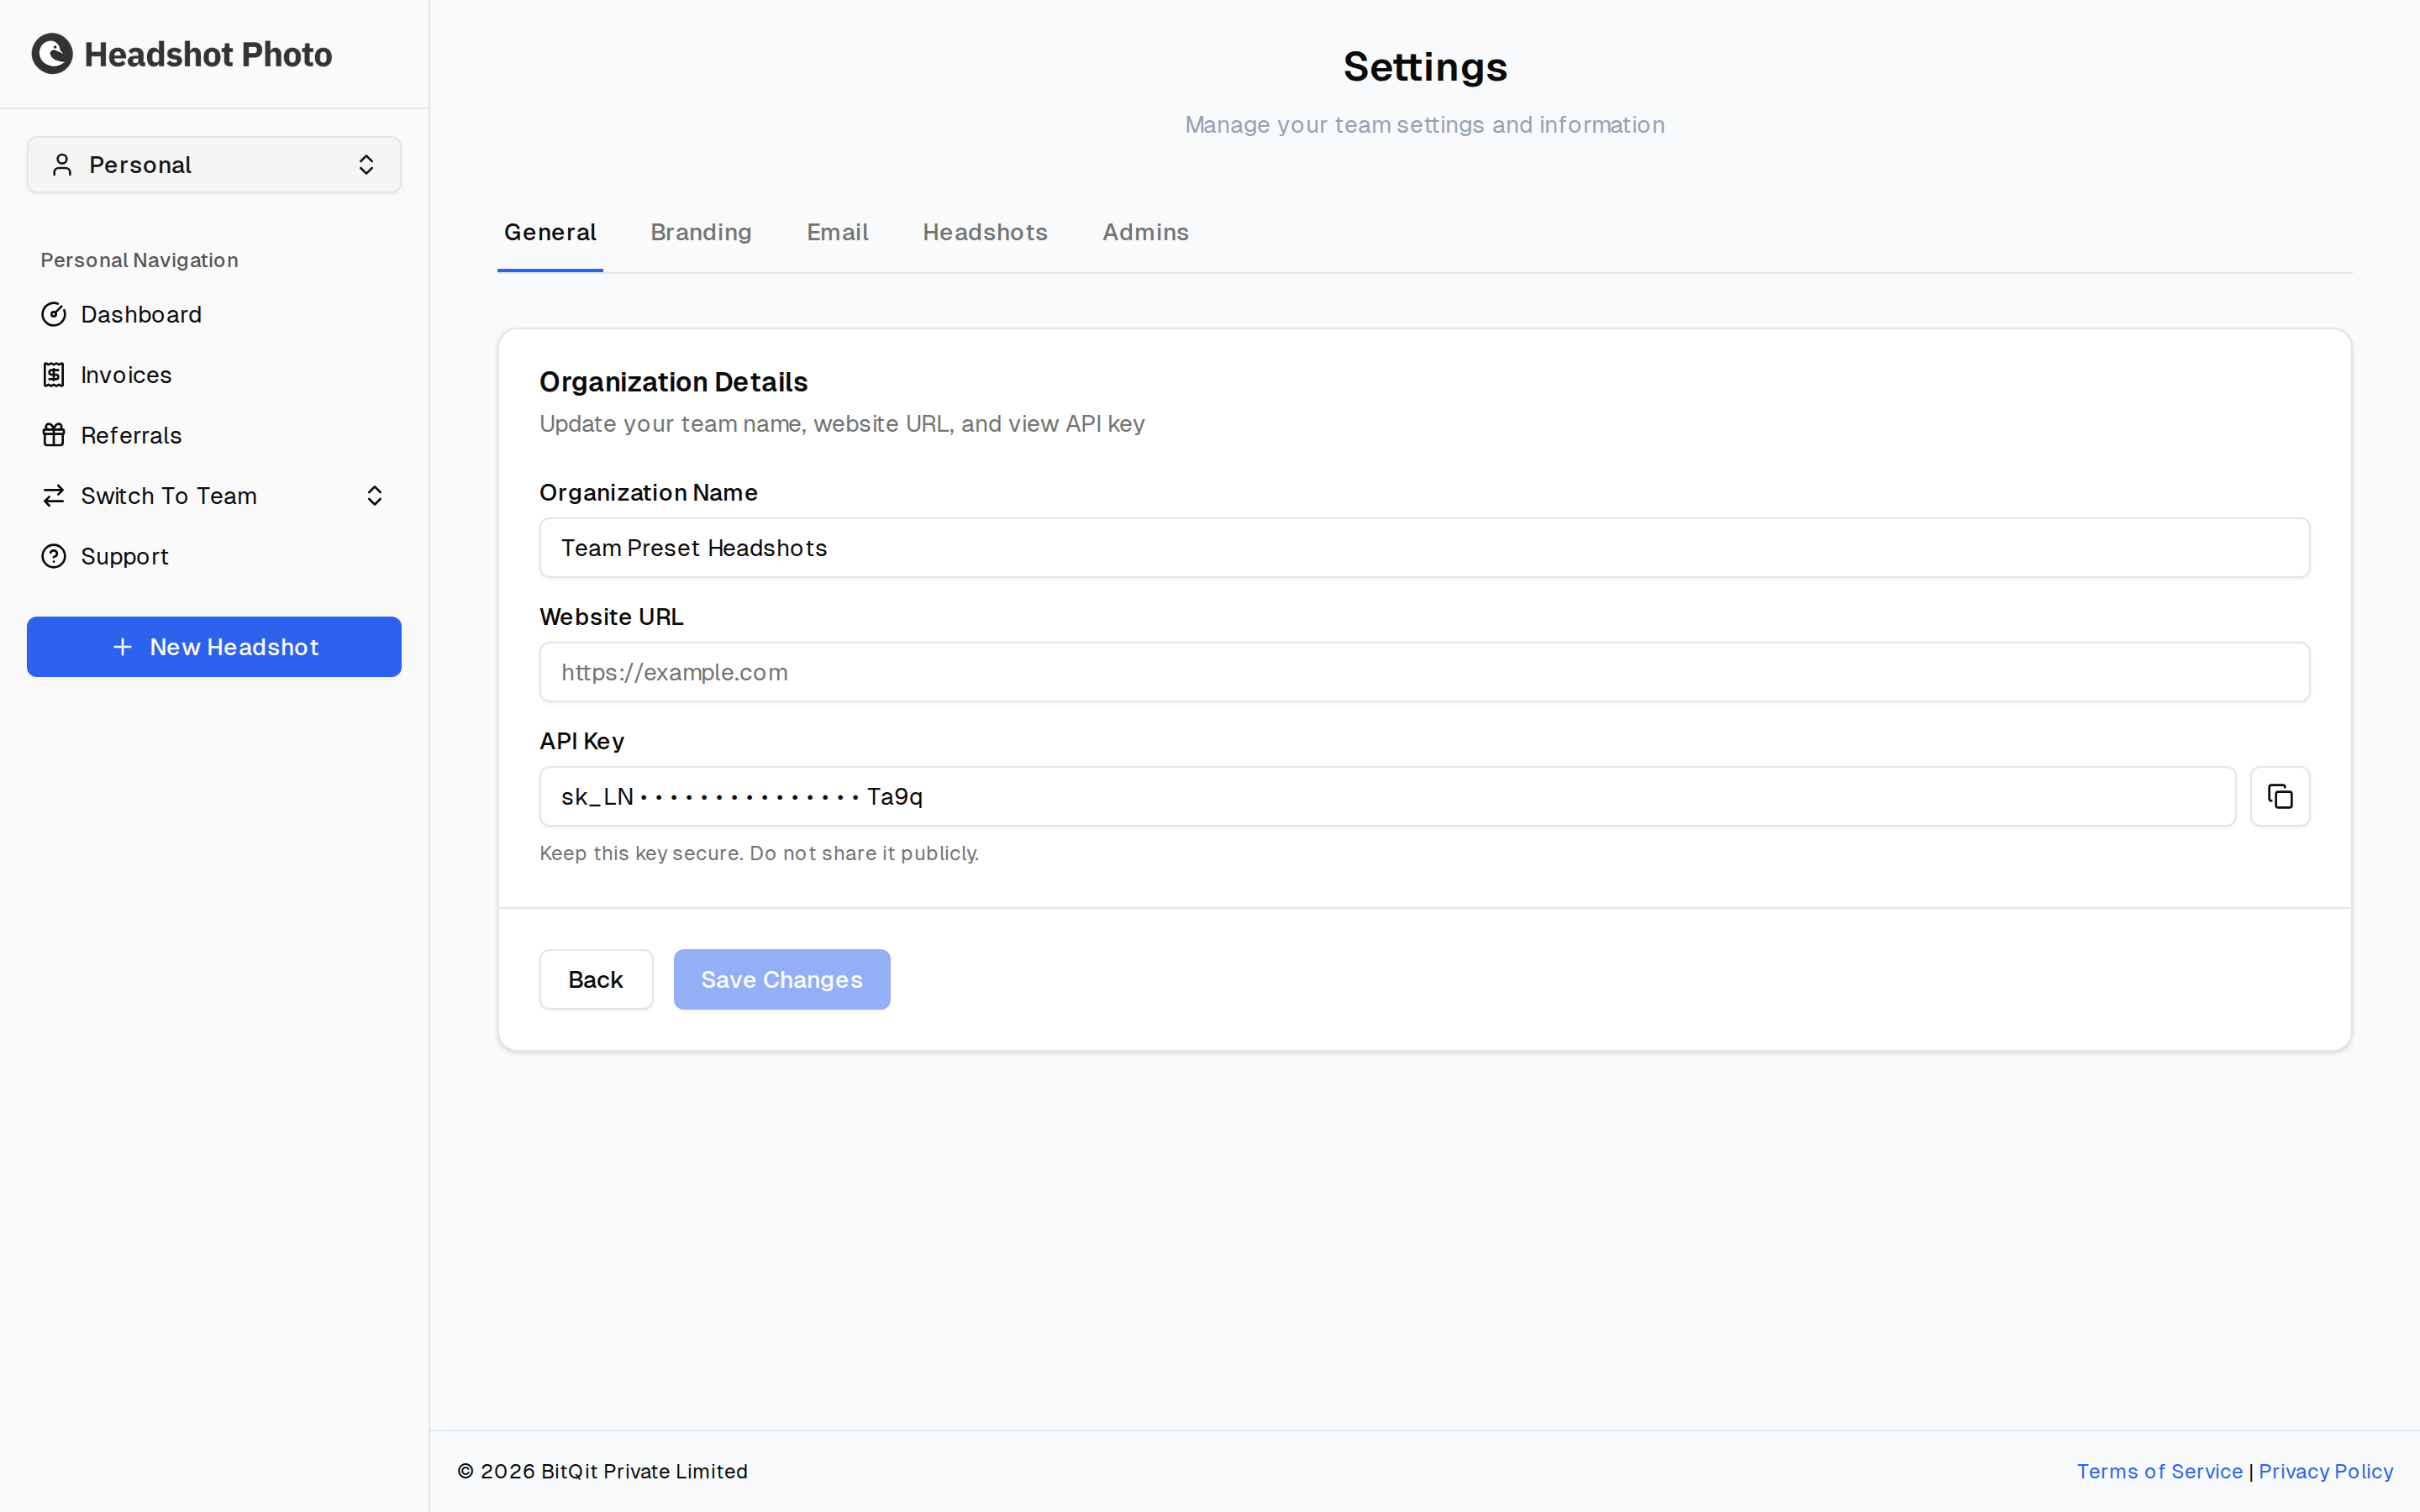
Organization Details
One card holding the basics:
- Team name — shown in invitation emails and on the team dashboard
- Website URL — optional, adds credibility to invitation emails
- API key — revealed on demand for integrations
Click Save Changes to apply edits to the name or website.
Deleting a team
Team deletion is not available to team owners or managers. The card is restricted to HeadshotPhoto platform administrators, and only for teams with no remaining credits.
If you need a team deleted, contact support at hello@headshotphoto.io. Before you do:
- Download every headshot you want to keep — deletion is permanent
- Confirm no active member still needs access
Branding
Three cards, covering how your brand appears on generated headshots:
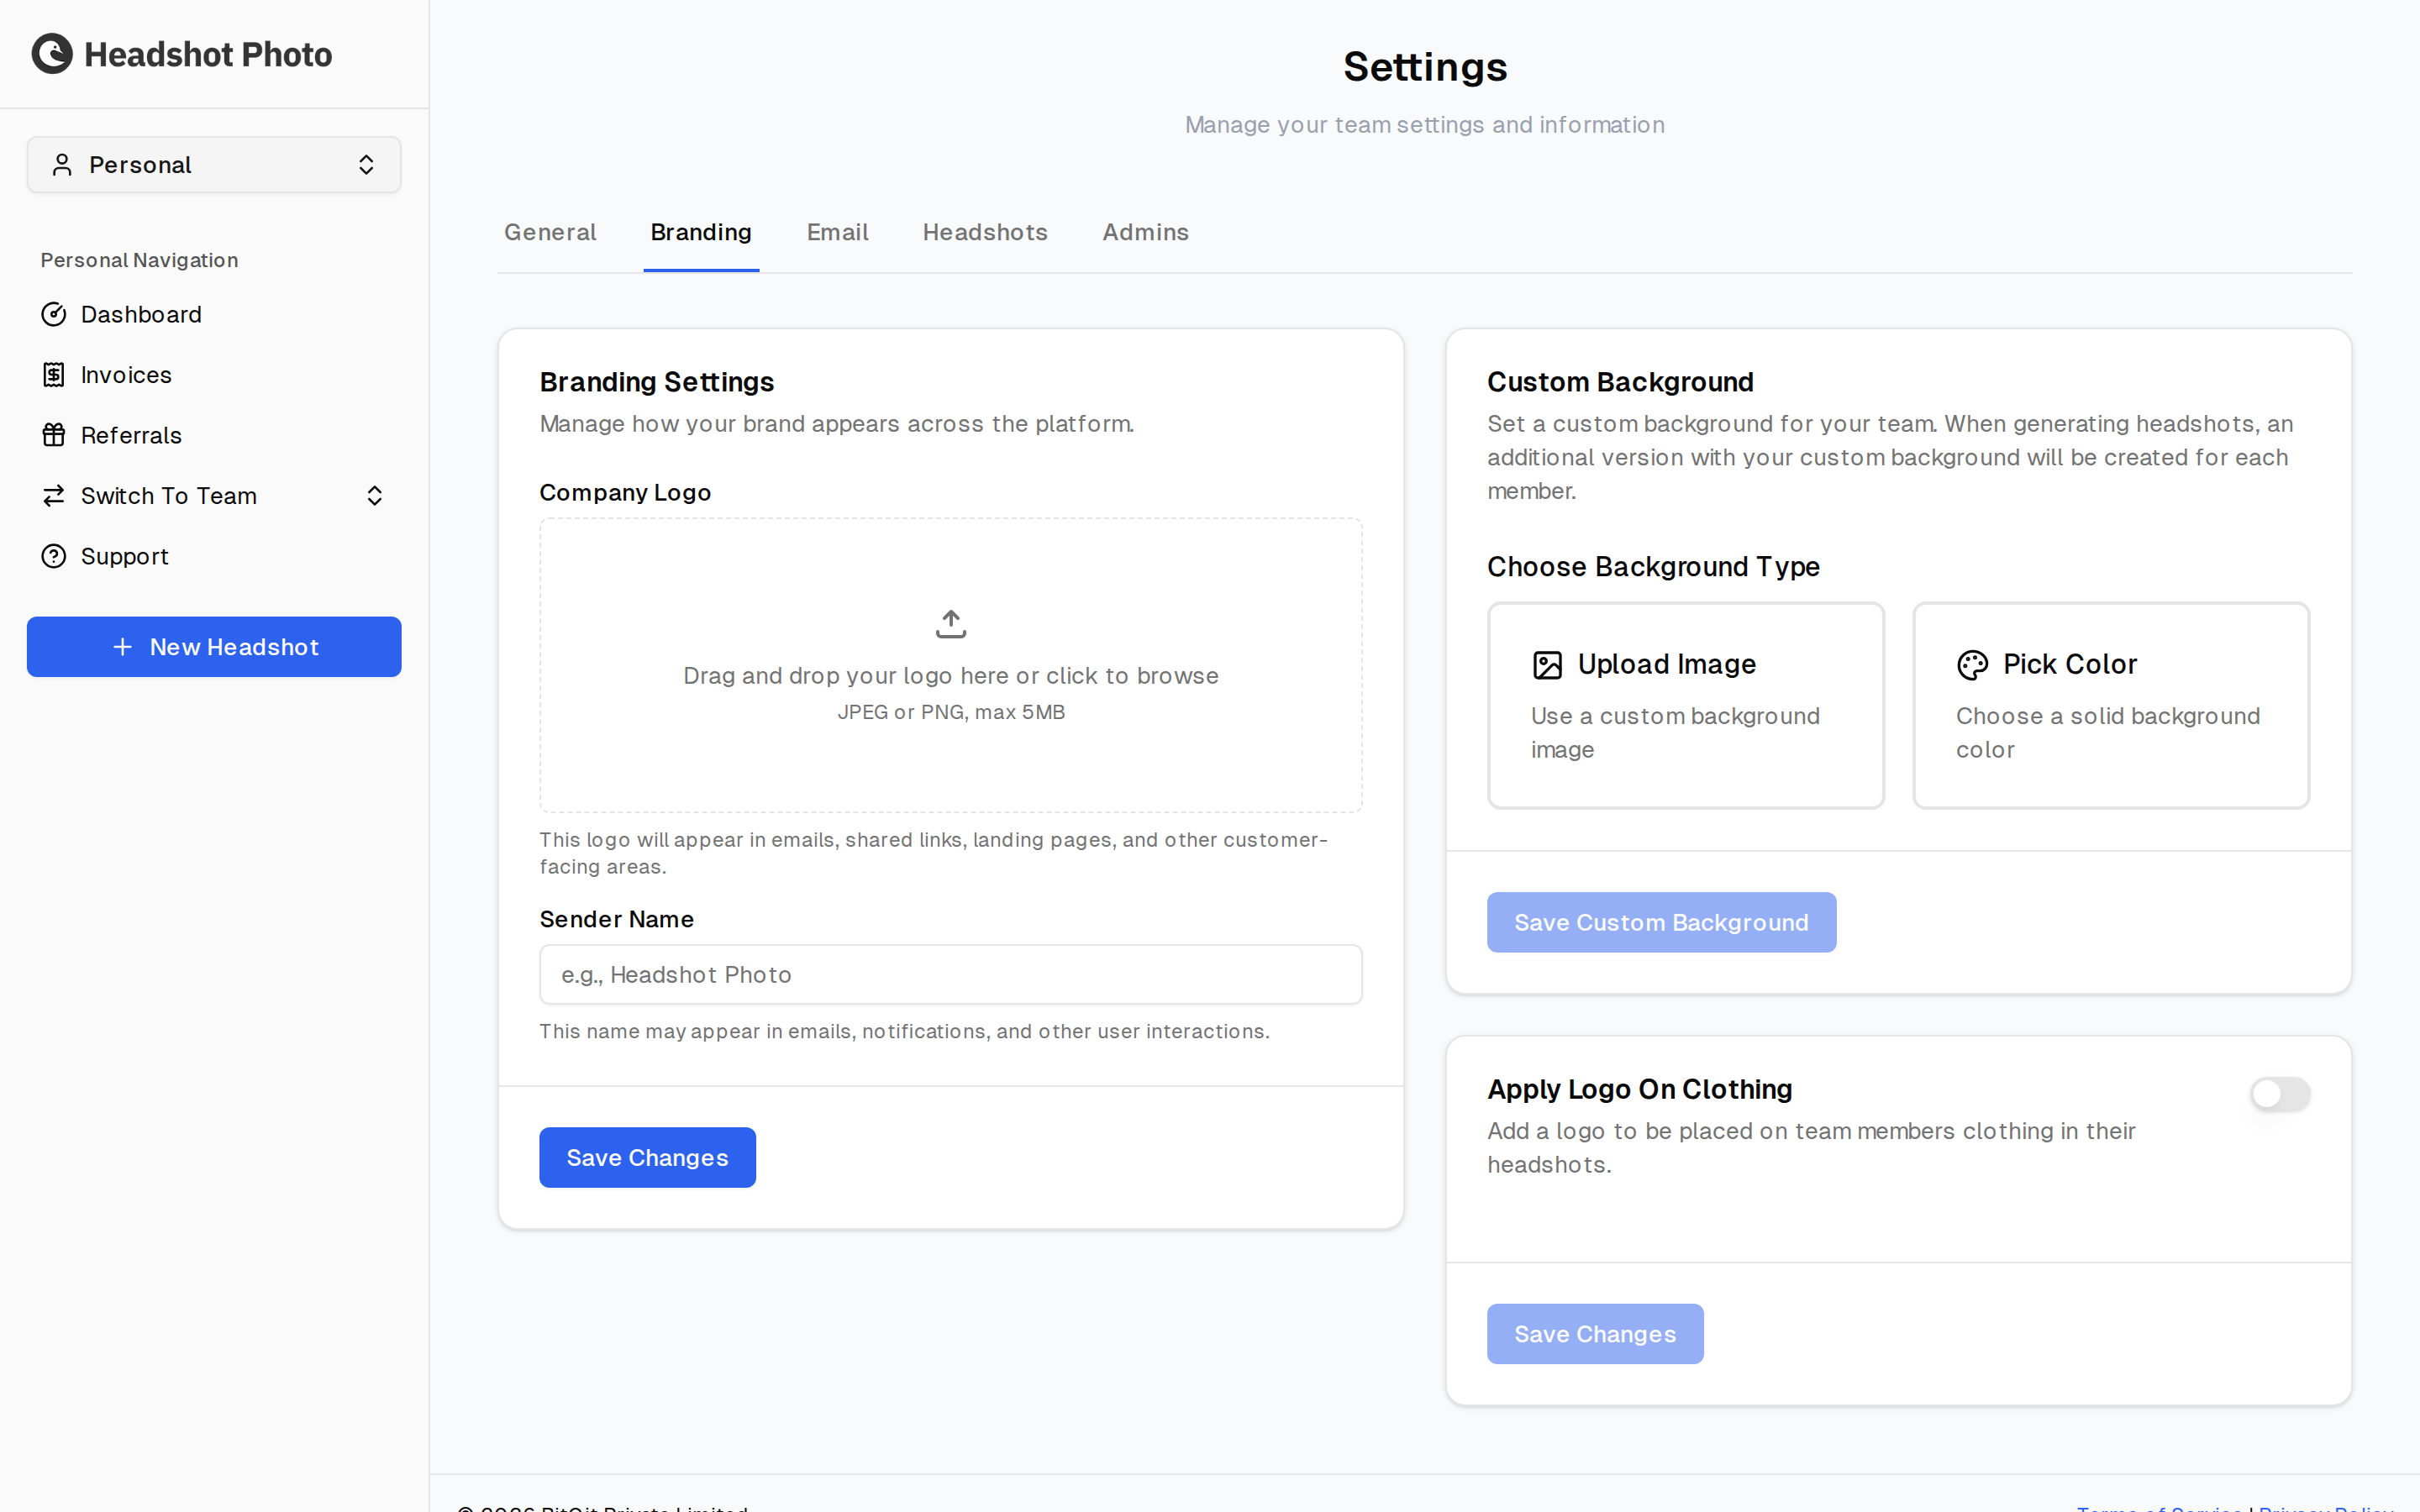
| Card | Purpose |
|---|---|
| Branding Settings | Your company logo and sender name, as they appear around the platform |
| Custom Background | Set a team background; an extra version of each headshot is generated with it |
| Apply Logo On Clothing | Toggle. Places your logo on members' clothing in their headshots |
Branding Settings
Two fields, both about how your organization is presented around the headshots rather than on them.
Company Logo
Drag a file in or click to browse. JPEG or PNG, up to 5MB.
Sender Name
The name your team appears under in the emails the platform sends on your behalf — invitations, reminders, and results-ready notices.
Leave it empty and your emails carry the default sender name. Set it to your organization's name and recipients see that instead, which makes an invitation far more likely to be opened and far less likely to be reported as spam by someone who did not recognise the sender.
Save Changes at the bottom of the card saves the logo and the sender name together. The button stays disabled until you change something.
Custom Background
Turn this on and every member gets an extra version of each headshot composited onto a background you choose, alongside their normal set.
There are two ways to define it, chosen with the two buttons at the top of the card:
| Mode | What you provide | Best for |
|---|---|---|
| Upload Image | Your own background image — drag and drop or browse | An office interior, a branded backdrop, a campus or storefront |
| Pick Color | A solid colour, chosen from a colour picker | A brand colour behind every member, or a clean flat background for the website |
Uploaded images must be PNG or JPG, up to 10MB, and at least 1024 x 1024px.
Whichever mode you pick, a Preview below shows the result as Background + Headshot = Branded Photo, using a demo model, so you can judge the combination before saving.
A single Email Settings card holding notification preferences and the addresses your team's mail uses:
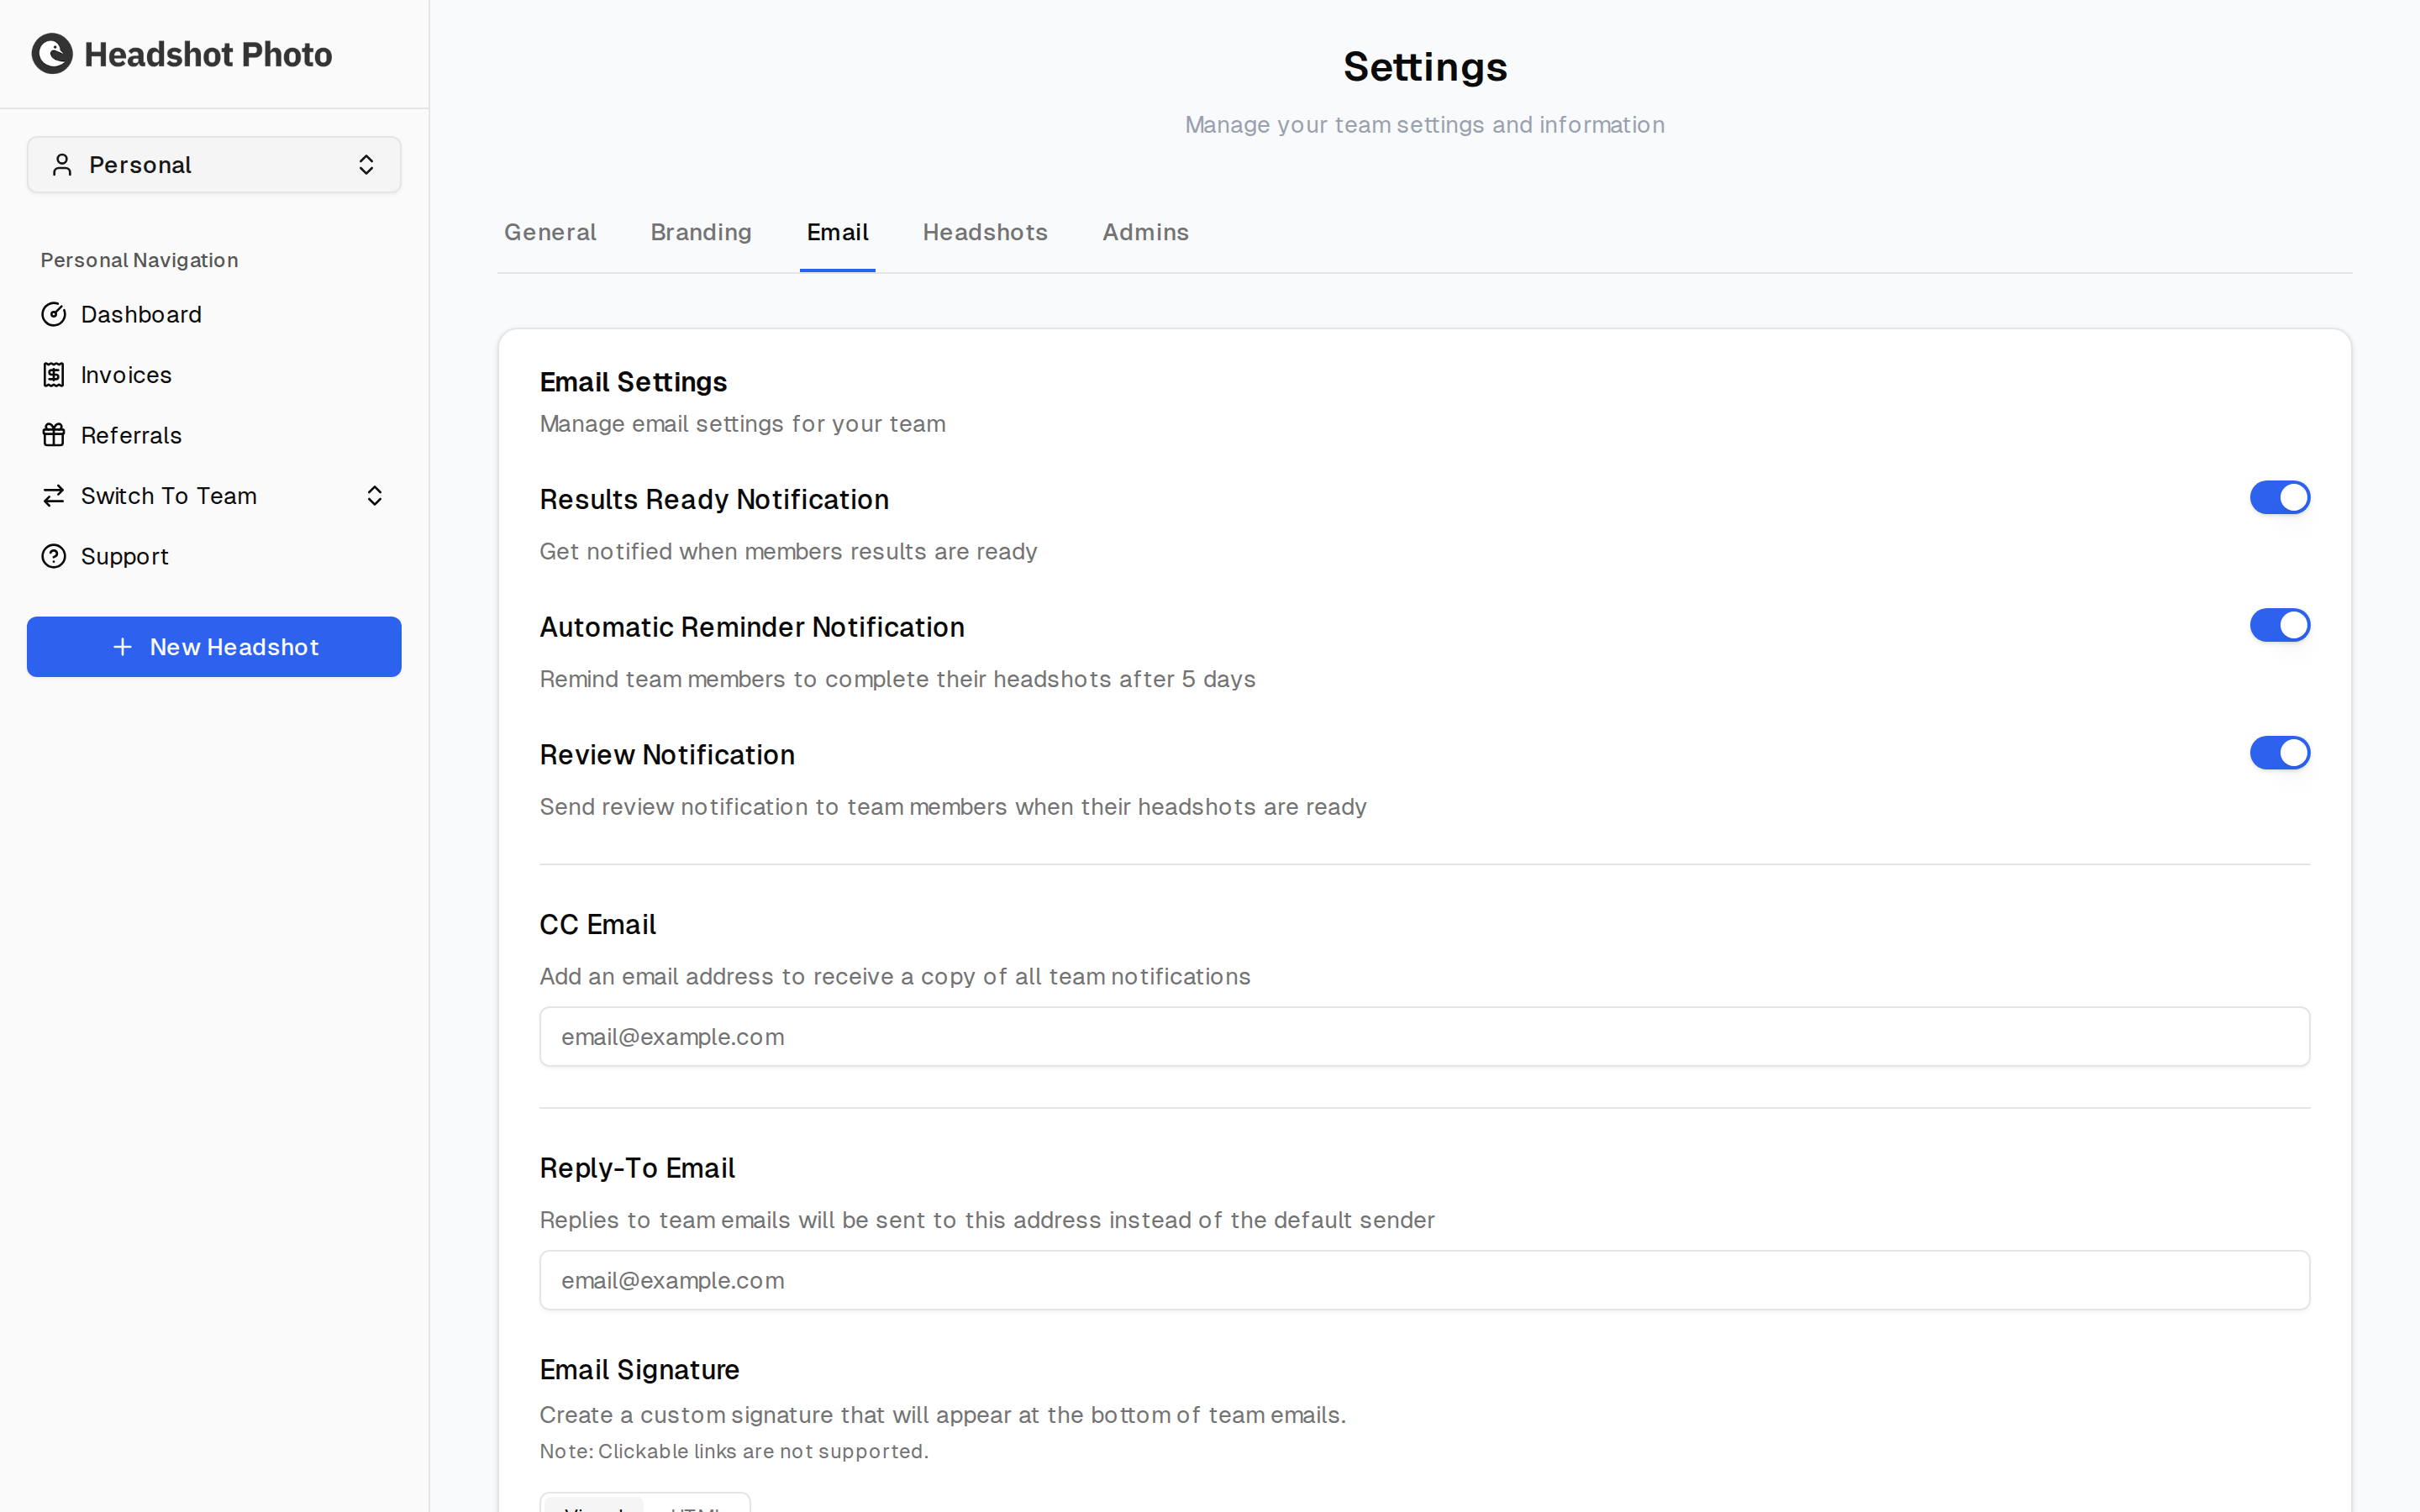
| Setting | Effect |
|---|---|
| Results Ready Notification | Email when a member's headshots finish generating |
| Automatic Reminder Notification | System chases members who have not accepted their invitation |
| Review Notification | Email when a headshot is ready for review |
| CC Email | Copies team emails to this address |
| Reply-To Email | Where member replies are delivered |
| Email Signature | A signature added to the bottom of every email your team sends |
Email Signature
Below the address fields, the Email Signature editor sets the sign-off that appears at the bottom of every email your team sends — invitations, reminders, and results-ready notices alike.
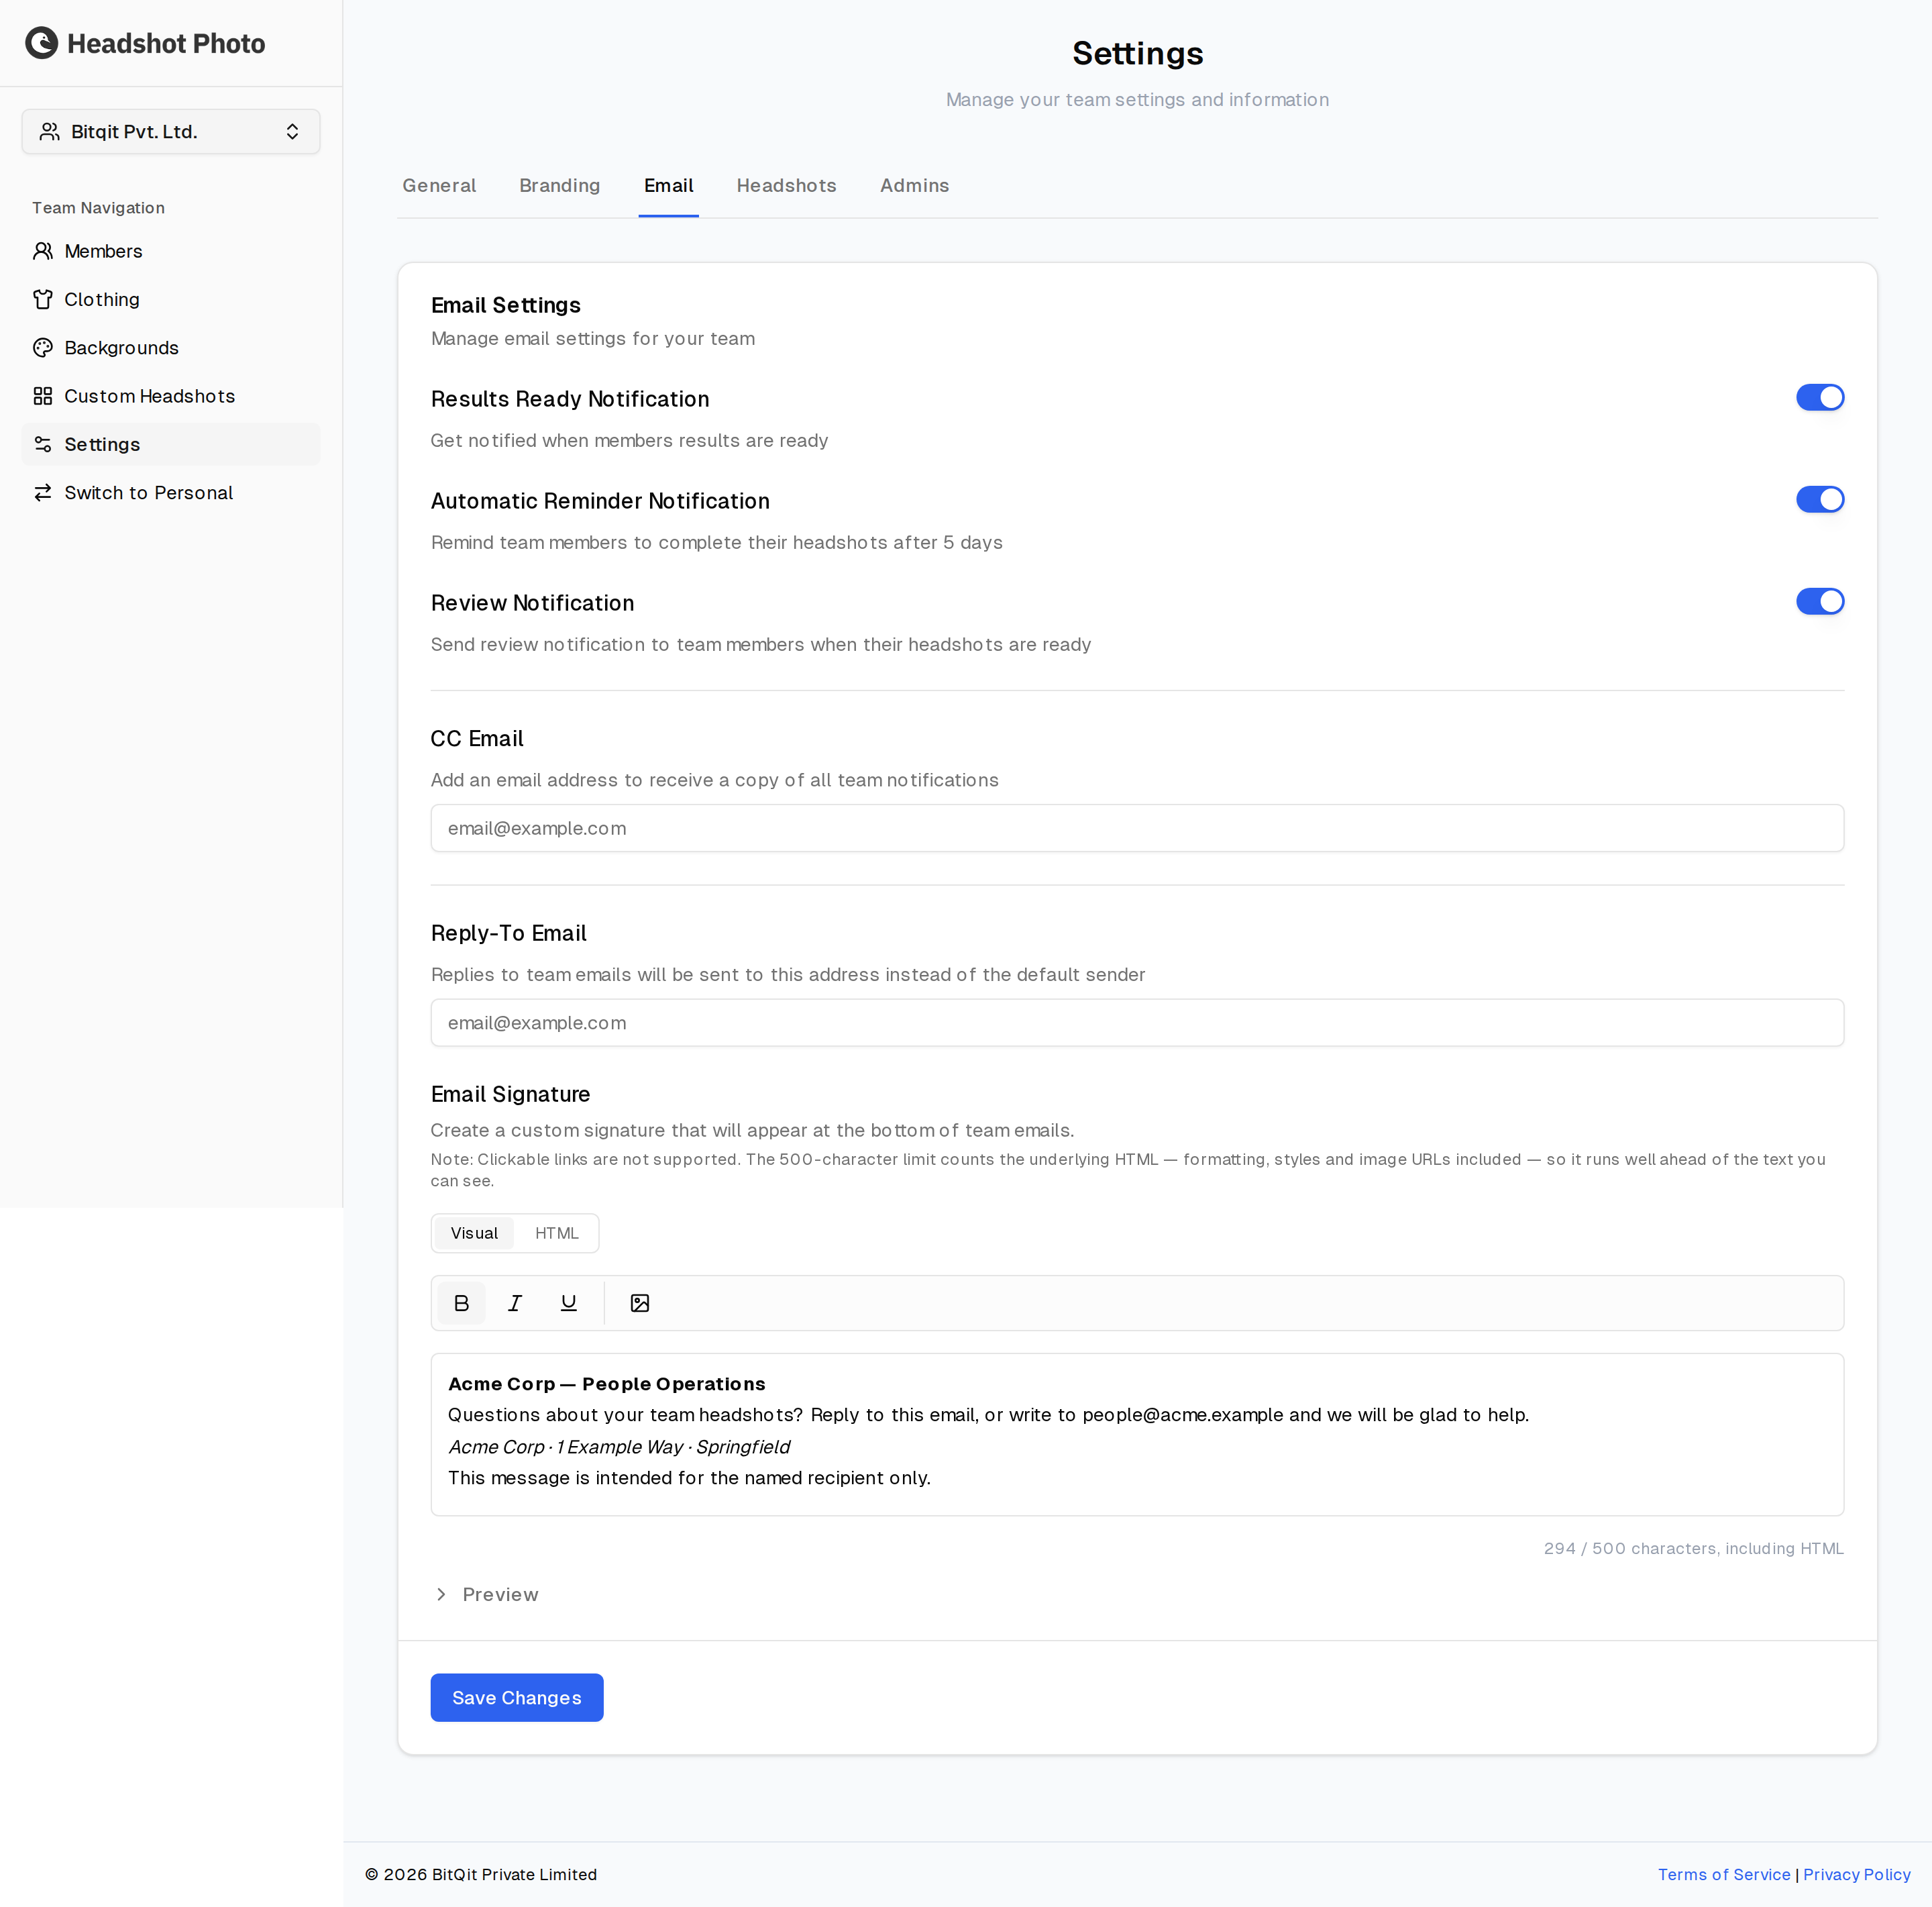
You can write the signature two ways, using the Visual and HTML buttons above the editor. Visual gives you a formatting toolbar; HTML lets you paste markup directly. Preview below the editor shows how the signature will look, and can switch between the rendered result and its HTML.
Clickable links are not supported — link tags are removed from the signature when it is saved.
The 500-character limit
A signature is capped at 500 characters, and the count below the editor shows where you stand:
| Counter | Meaning |
|---|---|
| Grey | Comfortably inside the limit |
| Amber | Within 50 characters of it |
| Red | Over the limit |
Save is refused while the counter is red, and the editor says how many characters to remove.
If your team's emails stop arriving
An over-length signature does not simply get trimmed — our email provider rejects the message outright, so every branded email your team sends stops being delivered.
If a signature saved before this limit existed is over 500 characters, you will see it flagged in red with a note that emails are not being delivered. You can still save the rest of the Email tab, so a long signature never locks you out of your notification or address settings — but the emails stay undelivered until the signature is shortened.
Headshots
Six rules governing what members must provide and what they get back:
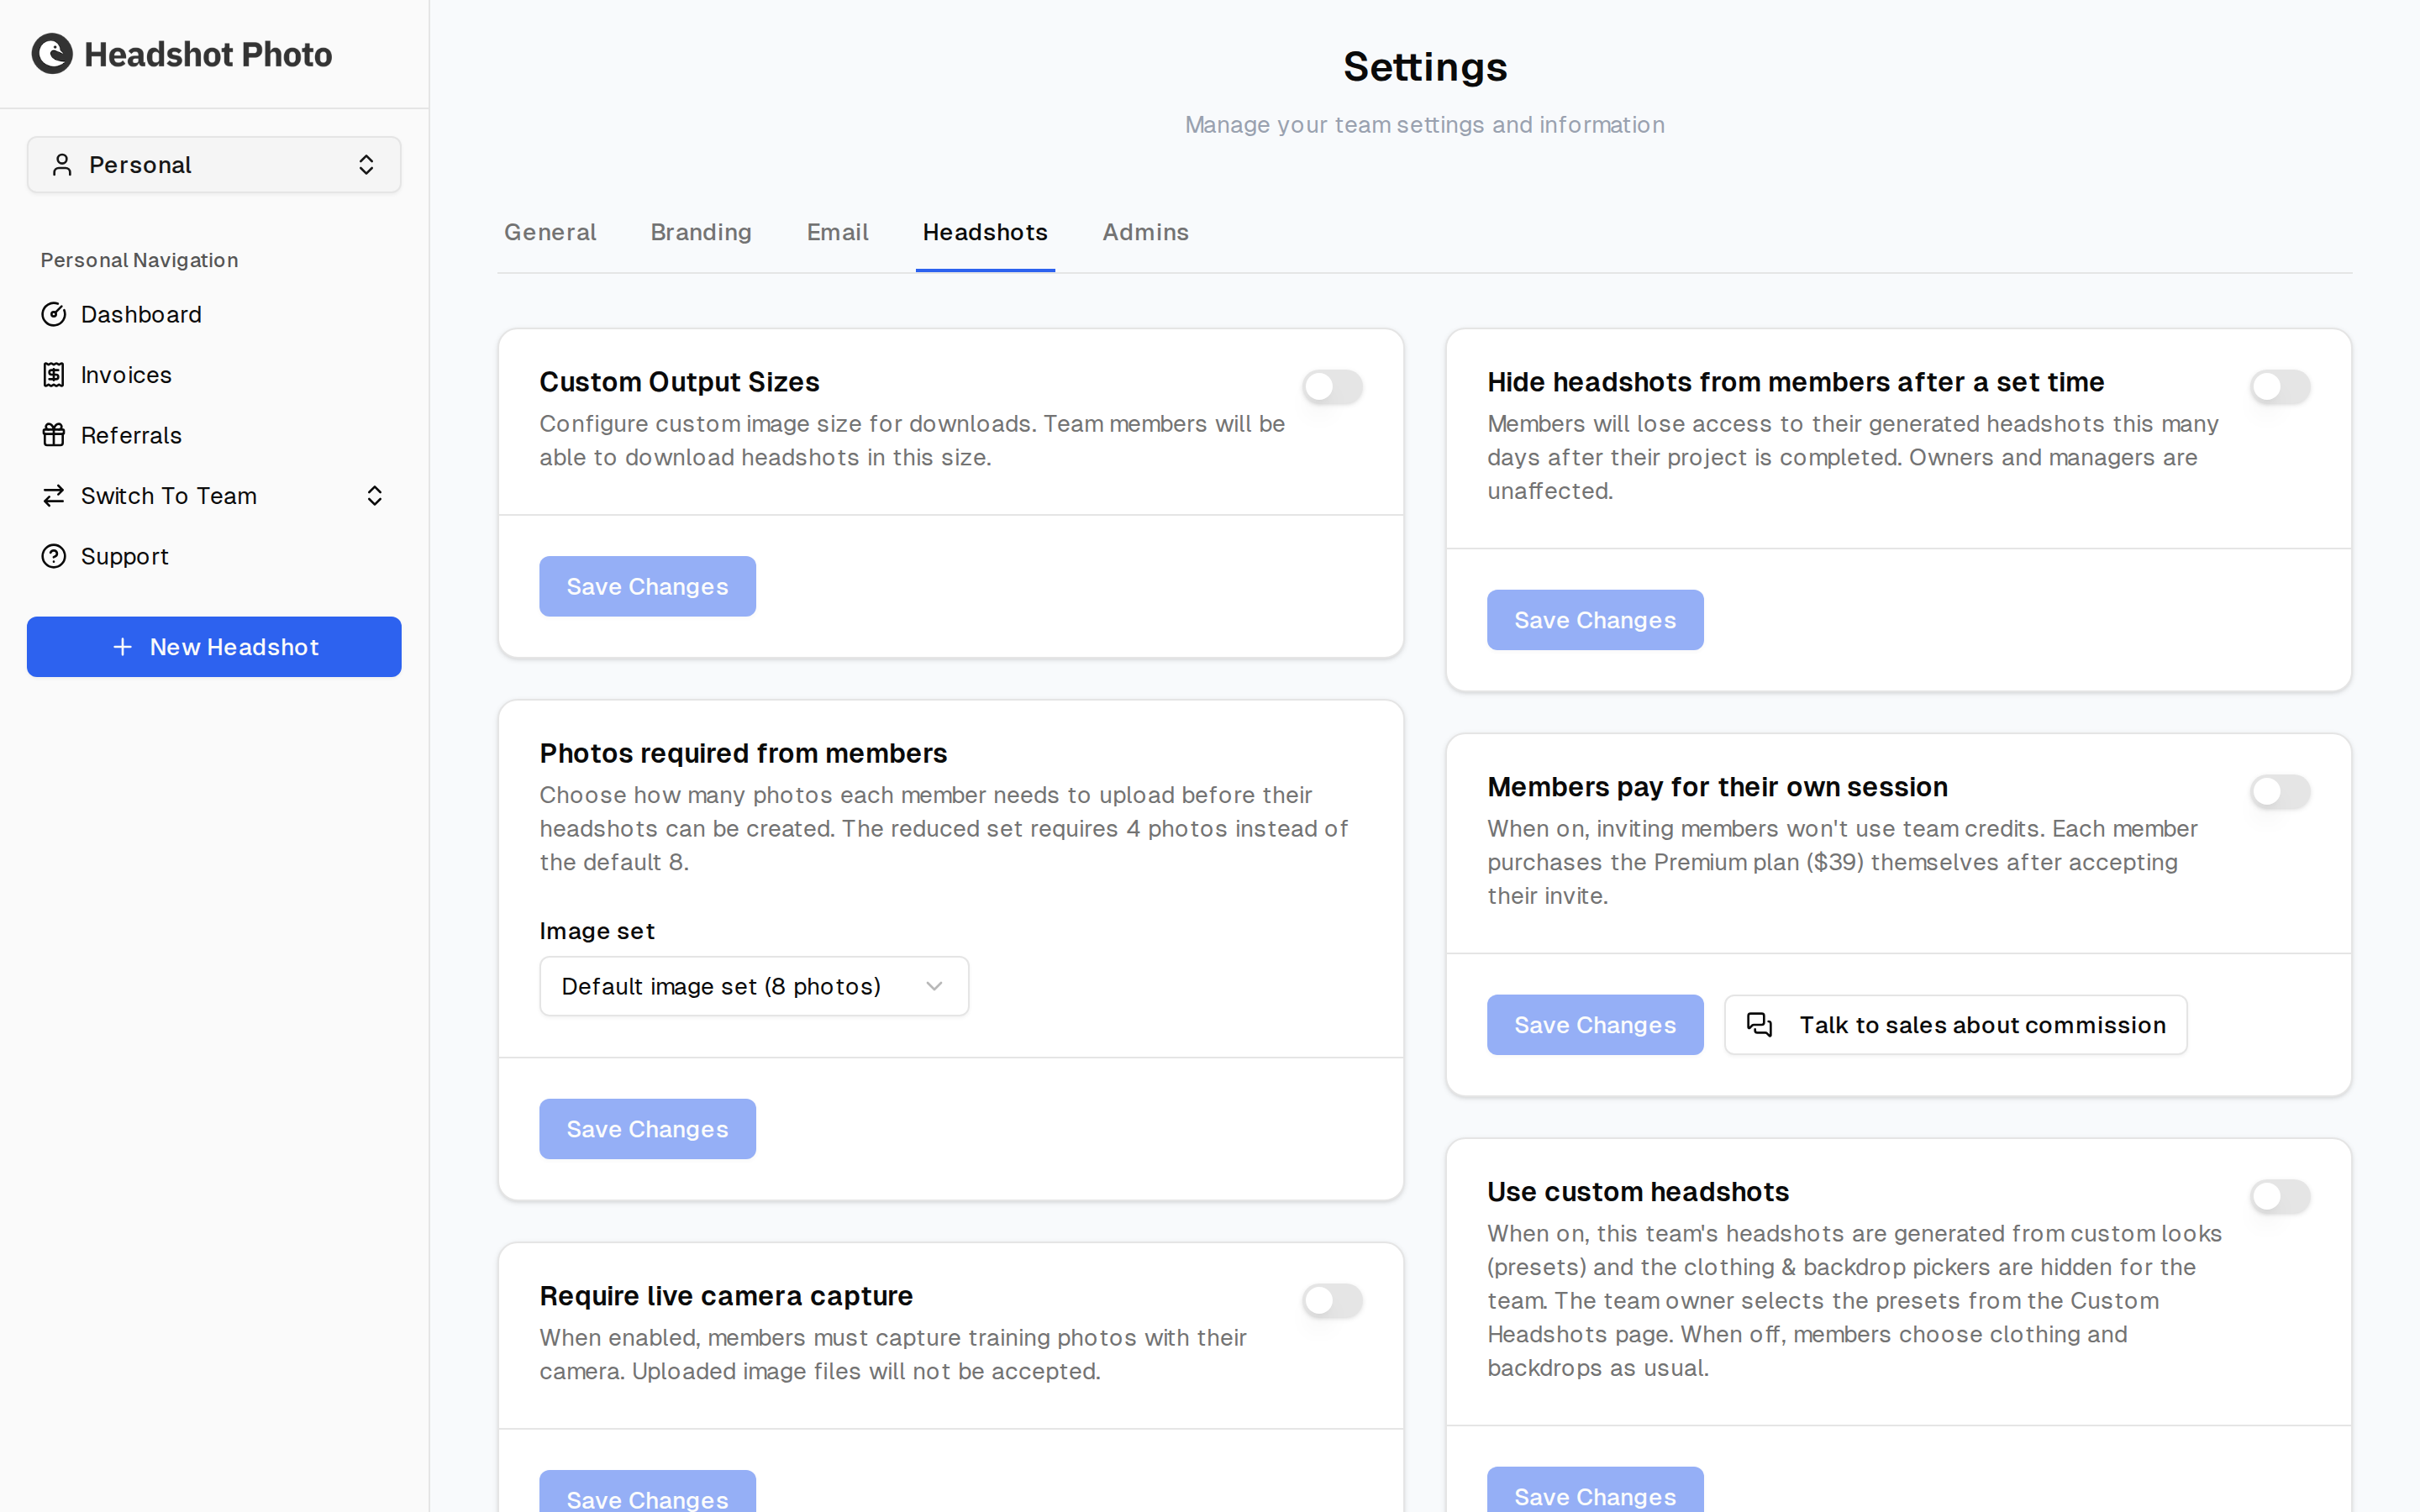
| Setting | Effect |
|---|---|
| Custom Output Sizes | Toggle. Lets members download headshots at sizes you define |
| Photos required from members | How many photos each member uploads before generation starts |
| Require live camera capture | Toggle. Members must use their camera; file uploads are refused |
| Hide headshots from members after a set time | Toggle. Members lose access this many days after their project completes |
| Members pay for their own session | Toggle. Invitations stop consuming team credits; each member buys their own plan |
| Use custom headshots | Toggle. Headshots come from custom looks (presets) rather than the standard flow |
Admins
The Admin Management card lists everyone with administrative access and lets you invite more. The team owner always appears first and cannot be removed.
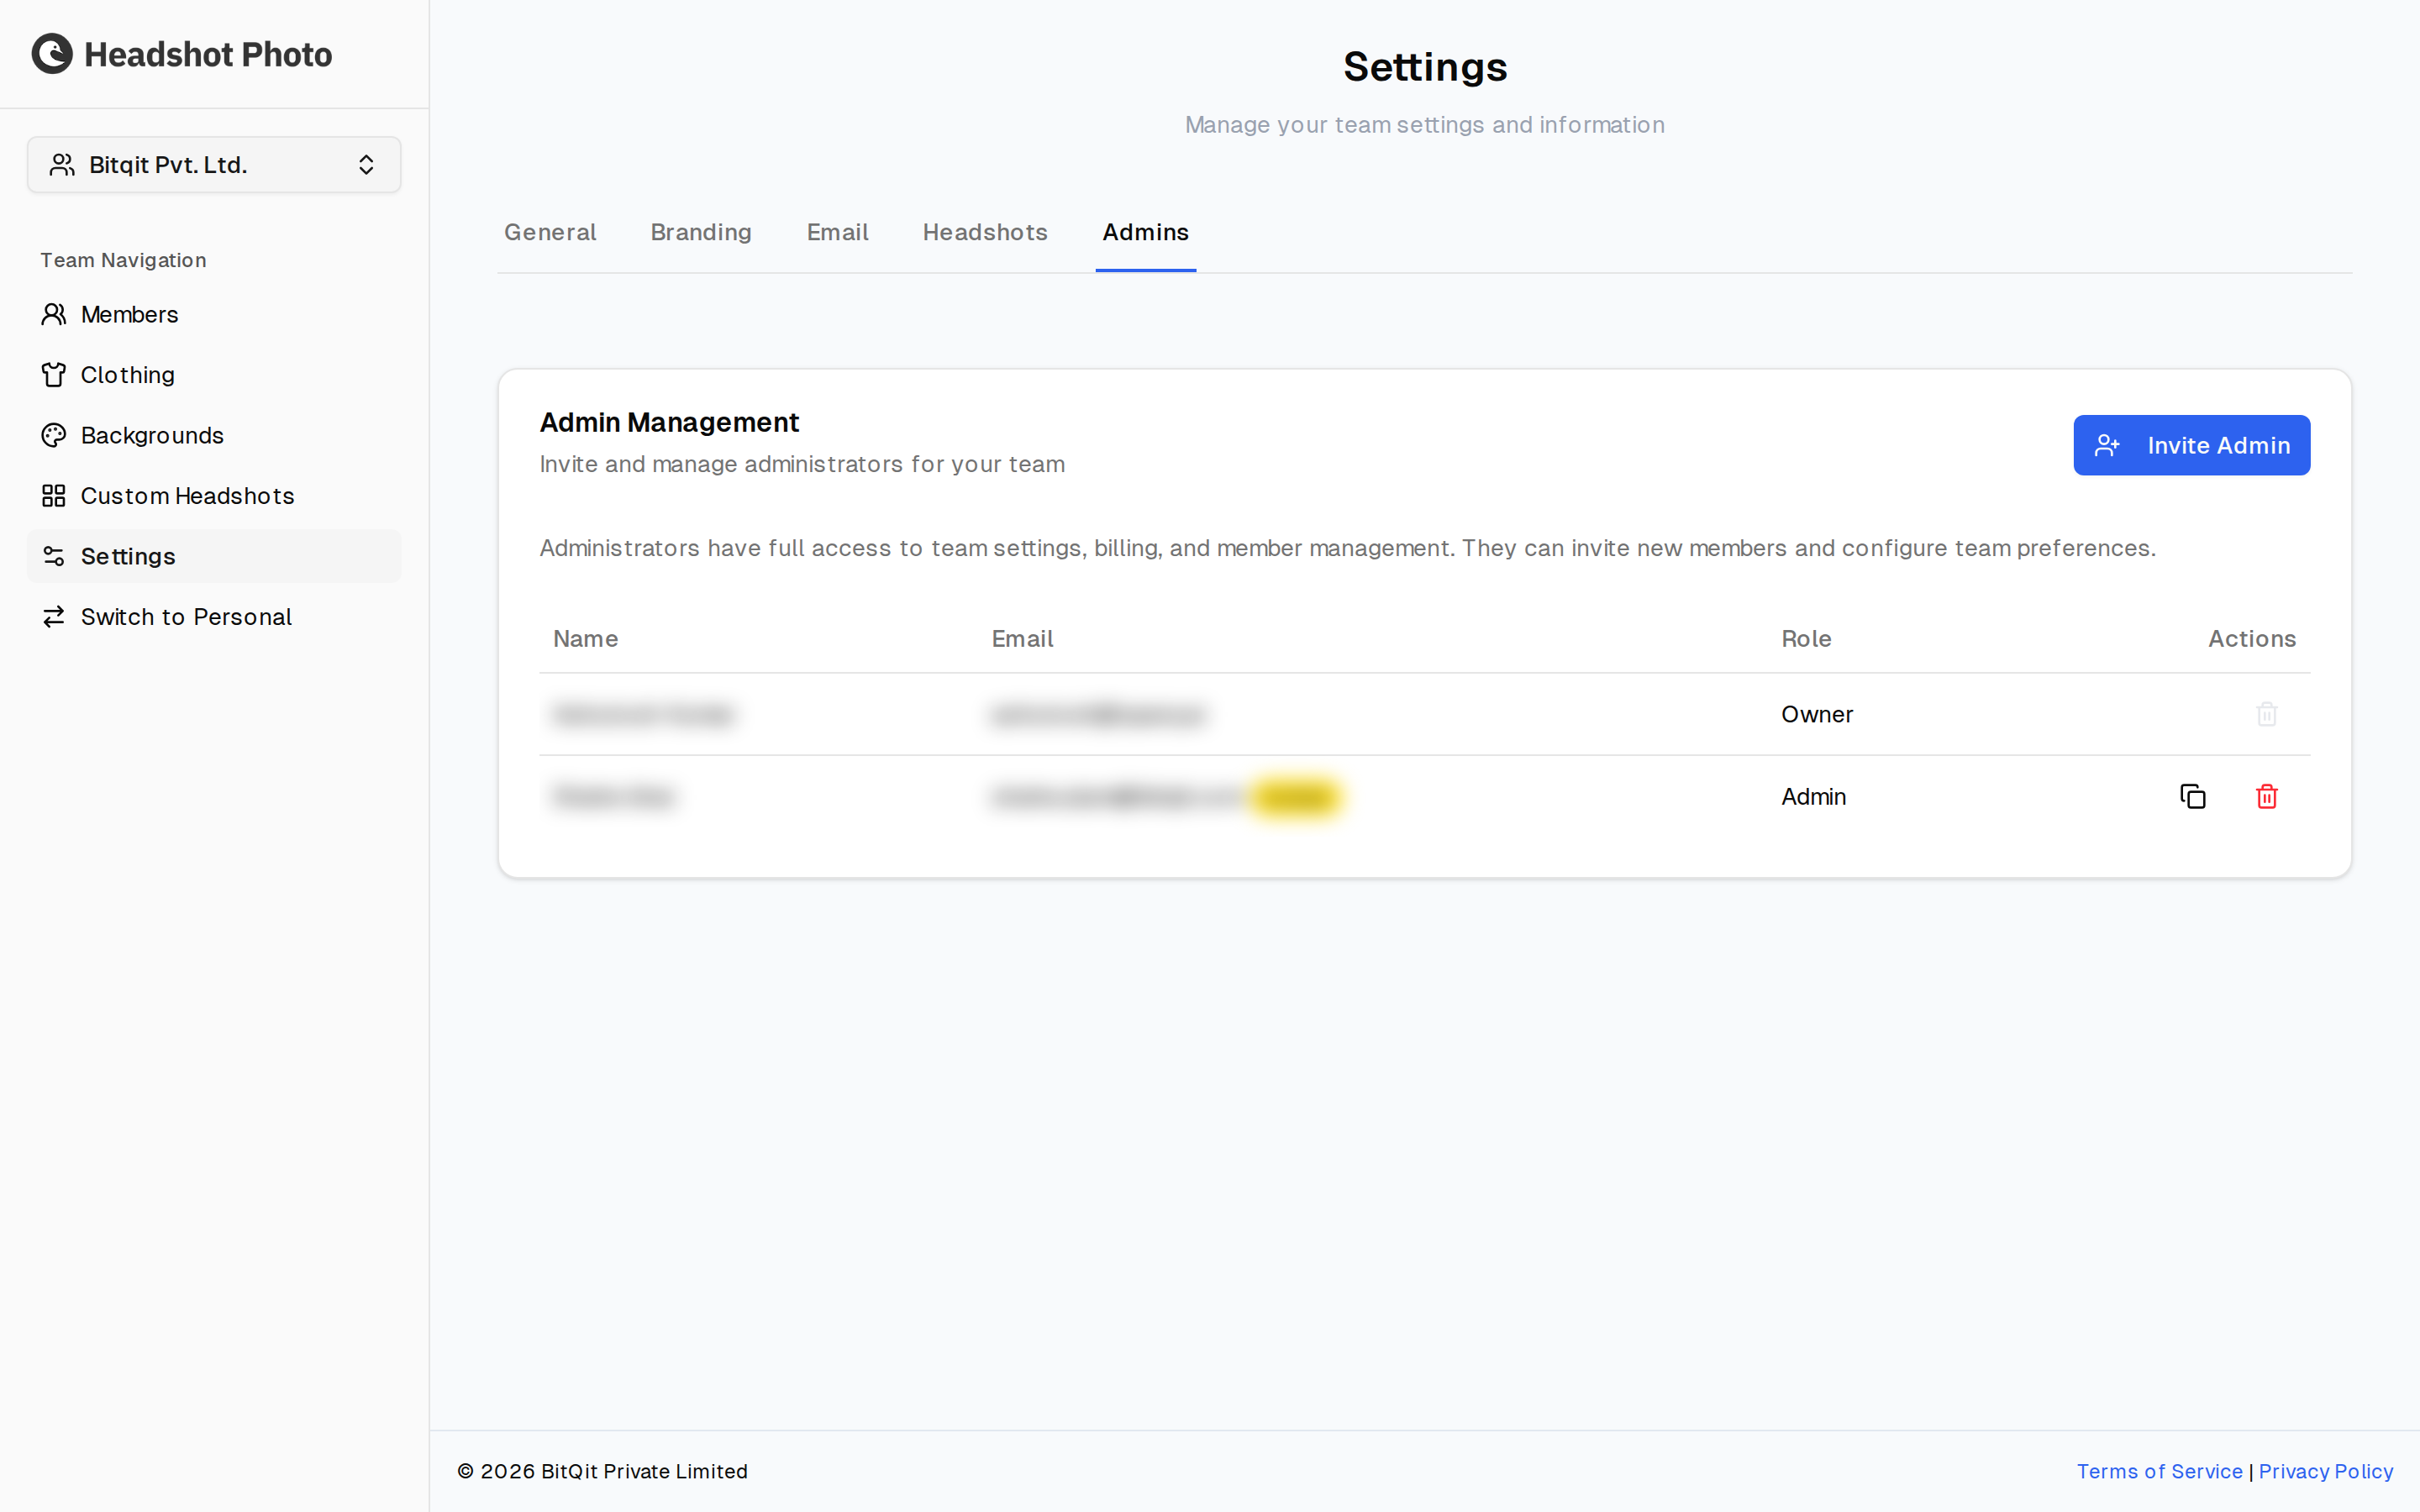
Each row shows a name, an email address, and a role. An administrator who has not accepted yet is marked Invited beside their email, and keeps a button to copy their invitation link. The name column falls back to a dash when there is nothing to show yet — see below for where a name comes from.
Inviting administrators
- Click Invite Admin
- Fill in one row per person: an email address, and optionally a name
- Click Add another for each additional person
- Send the invitations
Use the trash icon to drop a row you do not want. An email address is what makes a row count, so a row containing only a name is ignored, and an address that is not valid is outlined in red before you can send.
Once an administrator accepts and sets a name on their own account, that name replaces whatever was typed on the invitation. Names are per team, so labelling someone here does not rename them anywhere else they work.
Removing an administrator revokes their access to team settings, billing, and member management.
An admin invitation creates an administrator record only — it does not start a headshot session or consume a credit. So unless the same person was also invited separately as a member, they have no headshots of their own in this team, and removing their admin access takes nothing else away.
Troubleshooting
Can't access settings
- Verify you have Manager or Owner role
- Check you are viewing the correct team
- Log out and back in
- Ask the team owner to grant access
Team emails are not being delivered
- Open the Email tab and check the character counter under the signature
- If it is red, shorten the signature until it is under 500 characters and save
- Remember the count includes HTML — removing formatting and image URLs cuts it faster than removing words
Not receiving notifications
- Confirm the relevant toggle is on in the Email tab
- Check the CC and Reply-To addresses are correct
- Check spam and junk folders
- Contact support if the problem persists
API key isn't working
- Confirm you copied the whole key
- Check your authentication header format
- Contact support for API-specific issues