Inviting Members
Once your team is configured with backdrops, clothing, and branding, you can invite members to generate their headshots. This guide covers all methods for adding and managing team members.
Adding Members by Email

Single Member Invitation
To invite one person at a time:
- Go to your Team Dashboard
- Click Members in the sidebar
- Click Add Member or Invite Members
- Enter the person's email address
- Select their role (Member or Manager)
- Click Send Invitation
The person will receive an email with a link to upload their photos and generate headshots.
Multiple Email Addresses
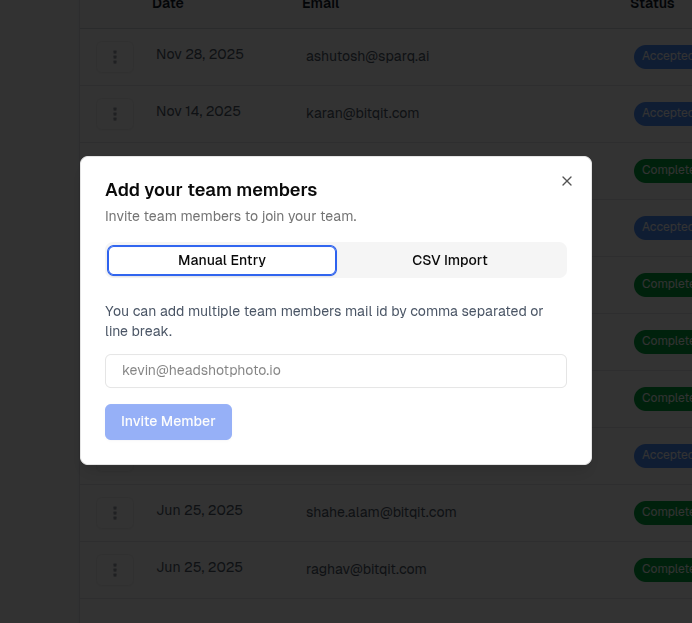
You can enter multiple email addresses at once:
- Enter each email address separated by commas or new lines
- All invitees will receive the same role
- Click Send Invitations
Example:
john@company.com
jane@company.com
bob@company.com
Bulk Import via CSV
For large teams, CSV import is the fastest method.
CSV File Format
Your CSV file should include email addresses. The simplest format is:
email
john@company.com
jane@company.com
bob@company.com
Optional: Include Names
You can include names for better personalization:
email,name
john@company.com,John Smith
jane@company.com,Jane Doe
bob@company.com,Bob Johnson
Import Steps
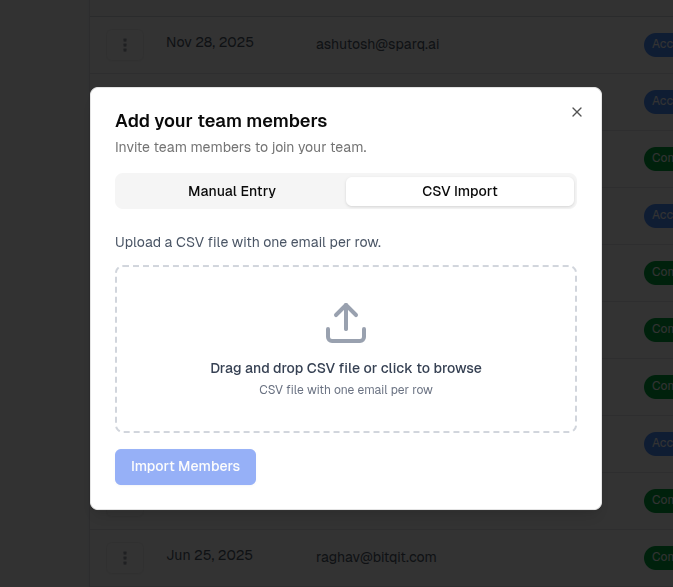
- Go to Members in your team dashboard
- Click Import CSV or Bulk Import
- Select your CSV file
- Review the parsed data
- Choose whether to send invitation emails immediately
- Click Import
Member Roles
When inviting members, you assign them a role:
Member Role
- Can upload their own photos
- Can view and download their own headshots
- Cannot access team settings or other members' data
- Most team members should have this role
Manager Role
- All Member permissions, plus:
- Can invite and remove other members
- Can view all team members and their status
- Can access team settings and billing
- Can manage backdrops, clothing, and branding
What Members Receive
When you send an invitation, members receive:
- Email invitation with:
- Your team/organization name
- Brief description (if provided)
- Link to accept and upload photos
- Personalized link that:
- Takes them directly to the photo upload page
- Associates them with your team
- Applies your team's styling and branding
Managing Invitations
Viewing Invitation Status
From the Members page, you can see:
- Email address of each member
- Role (Member or Manager)
- Status (Invited, Accepted, Completed, etc.)
- Date invited
Sending Reminders
For members who haven't responded:
- Find the member in the list
- Click Send Reminder or the reminder icon
- They'll receive another invitation email
Canceling Invitations
To remove a pending invitation:
- Find the member in the list
- Click Cancel or the cancel icon
- The invitation link becomes invalid
The person will no longer be able to use the invitation link.
Removing Members
To remove a member who has already accepted:
- Find the member in the list
- Click Remove or the remove icon
- Confirm the removal
Best Practices
Before Sending Invitations
- Notify your team - Let people know to expect an email
- Check email addresses - Typos mean undelivered invitations
- Consider timing - Send when people can act on it
Clear Communication
Include context in your description:
Good example:
"Hi team, we're updating all headshots for the new website. Please upload 8+ photos by Friday."
Less helpful:
"Upload photos"
Batch vs. Individual
| Approach | Best For |
|---|---|
| Bulk CSV import | Large teams (20+), organized rollouts |
| Multiple emails | Medium teams (5-20) |
| Individual invites | Small teams, VIPs needing special attention |
Troubleshooting
Member didn't receive invitation
- Check the email address for typos
- Ask them to check spam/junk folders
- Resend the invitation
- Try a different email address
Member can't use invitation link
- Verify the invitation wasn't cancelled
- Check that the member is using the correct email
- Send a new invitation if needed
Next Steps
Learn about tracking member progress: