The first time I recorded myself talking to a camera, I deleted eleven takes before I finished a single sentence. My voice sounded strange, I forgot my own job title, and I said "um" roughly forty times.
If that sounds familiar, you're in good company. Most people freeze the moment a little red dot starts blinking at them.
Here's the reassuring part. A good video introduction has almost nothing to do with being a natural on camera. It comes down to a short plan, a decent setup, and one or two takes more than you think you'll need. Let me walk you through the whole thing.
Why bother with a video introduction at all?
A written bio tells people what you've done, but a video shows them who you are: your tone, your energy, the way you actually speak. That difference is why short self-introduction clips keep showing up everywhere.
You might use one for a video resume attached to a job application. Or a friendly clip on your LinkedIn profile, sitting right next to your headshot. Freelancers drop them onto portfolio pages so clients get a feel for them before a call. People in sales send them in cold outreach, so a stranger sees a face instead of another wall of text.
The format works because people trust faces and voices more than paragraphs. Thirty honest seconds can do more than a page of bullet points.

What to say in a video introduction
This is where most people get stuck, so let's settle it first. Skip the word-for-word script. A loose structure you can talk through works far better.
A simple order that holds up almost every time:
- Your name and what you do, in one plain sentence.
- One line on who you help or what you're good at.
- A specific detail or small story that makes you memorable.
- What you'd like the viewer to do next: connect, reply, book a call.
Keep it to thirty to sixty seconds. The thing people get wrong is trying to fit an entire career into one clip. A better idea is picking a single angle and letting the rest live on your resume.
Say it out loud a few times before you film. Not to memorize it, just so the words start to feel like yours.

How to make an introduction video
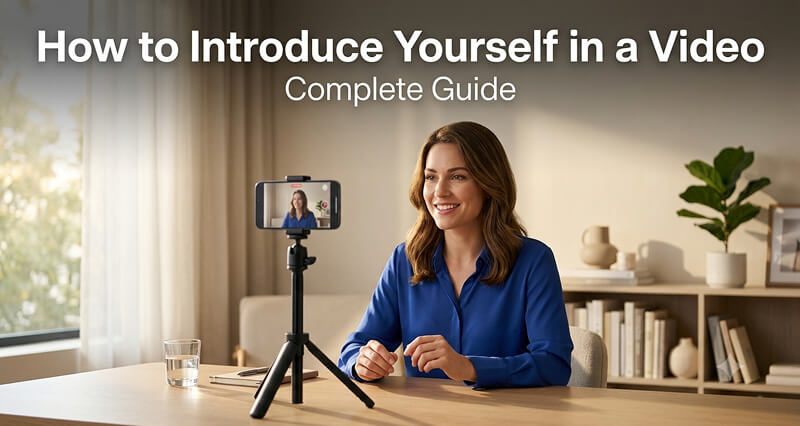
Now the practical part. This is how to introduce yourself in a video without a studio, a film crew, or any real budget.
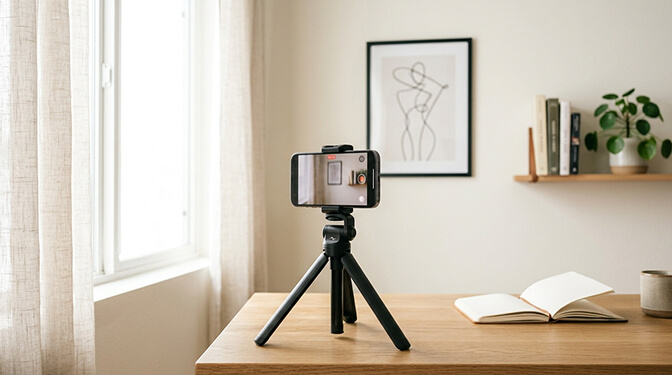
Start with light. Sit facing a window so soft daylight reaches your face. Never put the bright window behind you, or you'll turn into a silhouette.
Next, the camera. Your phone is more than enough. Prop it at eye level (a stack of books or a tripod works) and frame yourself from the chest up, with a little room above your head. Shooting from below gives everyone an angle nobody wants.
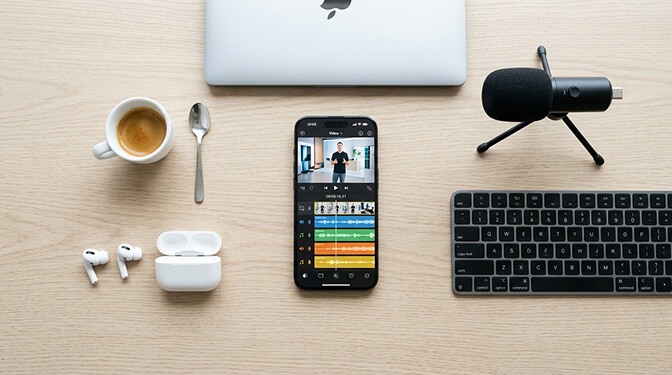
Then sound. This matters more than picture quality. A quiet room sounds far better than an echoey one, and even cheap earbuds with a mic are better than your phone sitting across the room.
Record a few takes. Look into the lens, not at your own face on the screen. When you're done, trim the dead air at the start and end, and you've got a clean clip. That last editing step is where the right software earns its place.
Tools to film and edit your intro
You don't need much. Here are a few tools worth knowing, from simplest to most hands-on:
- Your phone's built-in camera and editor. Fine for trimming and a quick crop, and the best place to start if you've never done this.
- CapCut. Free, popular for short social clips, with captions and templates.
- Movavi Video Editor. An easy-to-use desktop option for people who want to trim takes, generate subtitles, and tidy up audio without a steep learning curve.
- iMovie or Clipchamp. Solid, no-cost editors that are already on most Macs and Windows machines.
- Descript. Lets you edit your video by editing the text transcript, which is handy if you stumble a lot.
Any of these will get a short self-introduction looking neat. Pick one and stop comparing. The editor you actually open wins over the perfect one you never download.
Introduction video ideas worth borrowing
Stuck on format? A few introduction video ideas and examples to get something going:
- The straight-to-camera intro: just you, talking, with a plain background. Timeless for a reason.
- The day-in-my-work cut: a few clips of you doing the thing you do, with a voiceover on top.
- The walk-and-talk: filmed on a short stroll, which loosens up stiff speakers.
- The screen-share or whiteboard: great when your work is easier to show than to describe.
The top mistake across all of them is overproducing. A real, slightly imperfect clip almost always wins against a glossy one that feels staged.

A few tips before you start recording
A short list of tips that save the most grief:
- Smile right before you start talking. It changes your whole voice.
- Wear a solid color (just not white or black, perhaps), the same way you would wear for a headshot.
- Keep the background simple and tidy.
- Stop after three good takes. More rarely helps.
The fastest way to get comfortable is reps. Your fifth video will be miles better than your first, every single time.

The honest takeaway
Nobody watches a video introduction hoping for a TV anchor. They want a real person they might want to work with. Good light, a simple plan for what to say, and one decent editing pass will carry you further than any amount of on-camera talent.
Set the phone up. Say your name. Press record. The version of you that shows up on take three is the one people will be glad to meet.
Frequently Asked Questions
How long should a video introduction be?
Thirty to sixty seconds for most uses. Long enough to cover your name, what you do, and one memorable detail, short enough that nobody clicks away. For a video resume you can stretch to about ninety seconds.
What should I say in the first five seconds?
Your name and what you do, plainly. Skip the slow windup. People decide fast whether to keep watching, so lead with the useful part and save the context for later.
Do I need a real camera to film one?
No. A recent phone shoots better video than most people need. Decent light and clean audio matter far more than the camera itself, so put your effort there before buying any gear.
