Gone are the days when capturing a striking portrait required hiring a photographer, booking a studio, or owning expensive gear. Today, you can be both the photographer and the subject with a little brush of creativity, access to basic tools, and having the right mindset. That is the magic of self-portrait photography.
Self-portrait photography is no longer a trend. It has become increasingly popular. Thanks to selfies that made self-portrait photography a reality for photography fanatics. Did you know around 2 billion selfies and self-portraits are taken every day by 14-28 years old demographics? Self-portraits help individuals to express who they are, not just how they look. No wonder on platforms like Instagram, the hashtag #selfportrait has over 15 million posts, proving that this creative medium of photography is rapidly gaining momentum.
Whether you want to build your personal brand, explore your artistic side, or just capture yourself in a new light, self-portrait photography makes it possible. No need to have an elaborate team or a studio. You can capture your self-portraits without any pressure.
In this guide, we will learn more about self-portrait photography and explore how to get started with it. We will share a list of tools you need (including AI options like Headshot Photo) to master self-portrait photography and capture fun, stunning pictures without any hassles.
Understanding Self-Portrait Photography

Self-portrait photography method works incredibly well for headshots because -
- You can take your time and experiment freely.
- You do not need to rely on someone else’s schedule.
- You do not need to spend on a professional session.
- You get to curate how you want to be seen. For example, polished, friendly, creative, or all three.
In fact, many people find that taking their own portraits helps them feel more at ease because they are not being watched or rushed.
Whether you are using a DSLR, or your smartphone, self-portrait photography allows you to take professional-looking photos on your own terms. You do not need a studio or expensive gear to capture your photos. Just a plan, some patience, and a bit of light is all you need. Whether you are applying for jobs, updating LinkedIn, or building your personal brand, the right self-portrait can help you make that strong first impression.
Self-Portraits vs. Selfies - What is the Difference?
At first glance, a selfie and a self-portrait might sound similar. They are both photos you take of yourself. But, there is a huge difference.
A selfie is usually casual. It is usually snapped at the moment. It is taken with your phone’s front camera, often by holding your phone out at arm's length. You may tilt your phone at a certain angle or apply a filter to your selfies. Selfies are meant for quick sharing on social media. They can be fun and expressive and usually lack the polish required for professional use.
On the other hand, a self-portrait is intentional and thoughtful. You plan the background and set up a tripod while checking the lighting and other aspects. It is planned and carefully framed. You pay attention to your posture and expression to capture a photo that feels more confident and put-together.
Here is how self-portraits and selfies differ -
| Feature | Selfie | Self-Portrait |
|---|---|---|
| Intent | Casual, social | Professional, polished |
| Camera | Mostly front camera | Rear camera or DSLR/smartphone with tripod |
| Lighting | Often unplanned | Natural or controlled light |
| Composition | Off-center, wide angle | Framed, eye-level, well-cropped |
| Usage | Instagram, Stories | LinkedIn, portfolios, press kits |
How to Take Professional-Looking Self-Portrait Headshots (Step-by-Step Guide)
Creating high-quality self-portrait headshots at home is completely achievable. With the help of the right tools, techniques, and mindset, you can capture visually-appealing self-portraits without any difficulties. In this step-by-step guide, you will learn everything you need to know about self-portrait photography. From equipment to editing, this guide will help you shoot confident and polished self-portraits without a photographer.
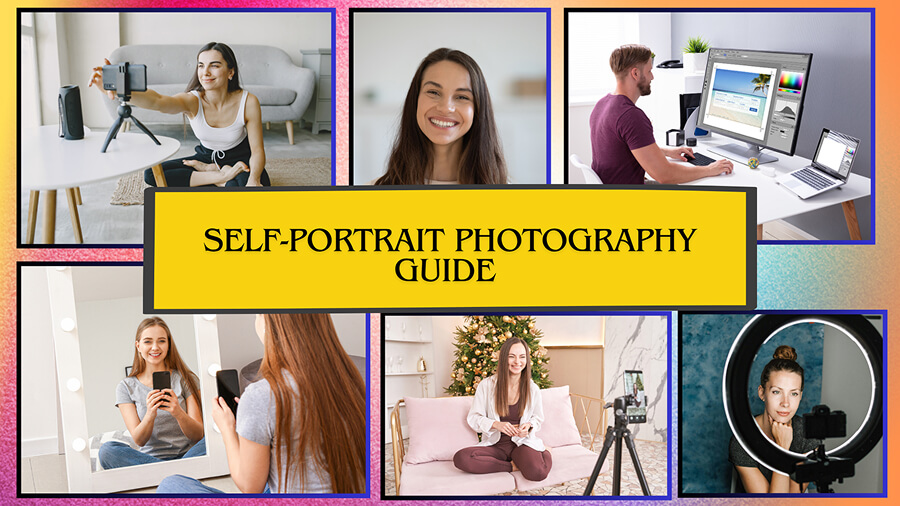
Step #1 - Choose the Right Equipment and Tools

- Camera - Whether you are using a DSLR, a mirrorless camera, or a smartphone, each has its strengths. DSLRs and mirrorless cameras offer greater control over depth and lighting, while newer smartphones provide impressive image quality and built-in portrait modes.
- Tripods and Mounts - Tripod holds your framing steady and gives you room to experiment. Mini tripods or phone holders are compact and effective. It helps you capture steady and sharp self-portraits if you are using a mobile device.
- Lighting Equipment - Natural light works well for self-portraits. But if you need consistency or are shooting in low-light conditions, use a ring light or LED panel to soften shadows and highlight your features.
- Remote Shutters and Timers - To avoid the hassle of pressing the shutter button and rushing into frame, use a Bluetooth remote or your camera’s timer. It gives you more freedom to pose perfectly for your shot. It eliminates the awkward dash to the camera and helps you capture more composed shots.
Step #2 - Master Your Lighting Setup

- Use Natural Light - Face a window during the day for gentle and even light. If you are shooting outdoors, aim for early morning or late afternoon. You can also aim to shoot during the golden hour — just after sunrise or before sunset for more soft and diffused self-portraits.
- Add Artificial Light if Needed - If natural light is not an option for you, use artificial lighting like a ring light or compact studio light. Make sure the light source is even and slightly above eye level to mimic daylight.
- Play With Shadows - Lighting from the side can add depth to your face. Play with shadows, backlighting, or even silhouettes to give your self-portrait character. Remember to experiment until you find a flattering angle.
Step #3 - Nail Your Composition and Framing

Remember, instead of centering yourself perfectly, try positioning your face along the imaginary grid lines that divide the frame into thirds. This adds visual interest. Do not always center yourself. Place your eyes roughly one-third down from the top. This arrangement of placing yourself slightly off-center adds energy to your shot.
Further, choose a clean, uncluttered background to keep the focus on you. For example, clean walls, curtains, textured backdrops and so on. The goal is to avoid distractions and visual clutter that pull focus from your face as much as possible.
Lastly, incorporating negative space or breathing room helps emphasize your presence in the frame. Leaving a bit of empty space around you, especially on one side, can make your image feel more modern and airy. This also makes it easy for you to crop the image later.
Step #4 - Learn to Pose and Express Yourself Naturally

- Angle your body slightly and elongate your neck for a flattering silhouette. Avoid straight-on poses unless you are going for bold and direct. Keep your shoulders relaxed at all times. Remember small adjustments can completely change the vibe.
- A natural and soft smile usually works best. Think about something that makes you feel good to evoke a genuine expression. Remember authenticity always looks better than forced expressions.
- Include simple props like glasses, a notebook, or a plant to give your image a personal touch. If you feel stiff, try holding a book, leaning on a desk, or sitting on a stool. These small additions can help you feel more grounded and at ease while adding subtle context to your portrait.
Step #5 - Get the Technical Details Right

- Camera Settings - Always shoot in portrait mode if you are using your smartphone to capture your portraits. If you are using manual mode, set a wide aperture (like f/2.8) to blur the background, and a fast shutter speed to avoid motion blur.
- Focusing Techniques - Use autofocus with face or eye detection feature if available. If not, pre-focus on a stand-in object where you will be sitting or standing before stepping into the frame.
- Shooting Modes - Capture more than one shot. Using burst mode lets you capture multiple expressions quickly. The self-timer gives you time to get into position without rushing. This will ensure you have multiple shots to choose from.
Step #6 - Edit Smartly and Subtly

Here are a few tips to help you with the editing process.
- Explore various editing software options. Some of the best mobile-friendly options include Adobe Lightroom Mobile, Snapseed, and VSCO. Each offers simple sliders and presets to fine-tune your shot. These apps helps you enhance exposure, contrast, and tone for quick, high-quality edits.
- Adjust brightness, contrast, sharpness, and color balance without overdoing it. Crop to a standard headshot ratio (usually 4:5 or 1:1), and straighten the image if needed.
- Avoid over-editing by keeping textures like skin and hair natural. For example, excessive smoothing or filters can make your portraits look different than how you look in real life.
Frustrated with Self-Portraits? Get Pro Results With Headshot Photo
Taking a great self-portrait is hard, time-consuming, and frustrating. The lighting is sometimes never quite right, the angle feels off, and somehow your face looks nothing like it did in the mirror. If you have the lighting tips, adjusted your camera, and posed in front of the cleanest wall in your house, but, the result still does not feel like the best portrait. That is where Headshot Photo steps in.
Headshot Photo is an AI-powered tool that transforms a standard portrait into a polished, studio-quality picture. No fancy camera. No perfect lighting. No photographer. No hours of trial and error. All you need to do is upload a clear self-portrait, choose your preferred style, and let the AI work its magic. You will have professional-grade self portraits ready to download and use within just a few minutes. Our tool eliminates the stress of DIY photography altogether.
Try out Headshot Photo for yourself and generate excellent self-portraits without any hassles.
Wrapping Up
Self-portraits talks about your story, your brand, and your confidence. Taking your own self-portrait is not just about saving money or skipping the studio. It is about owning how you show up in the world. With the right setup and mindset, you can capture self-portraits that look confident, polished, and uniquely you.
However, not everyone has the time or desire to fine-tune every frame. That is where tools like Headshot Photo come in. Headshot Photo simplifies the process and help you look your best without the hassle. It gives you creative freedom and saves money, while delivering a portrait that looks like you, at your best.
Whether you DIY your way to a great shot or use a little AI support, you do not need anyone else to look professional, credible, and confident in your self-portraits anymore.
FAQs
1. What is the difference between a self-portrait and a selfie?
A self-portrait is typically more intentional and carefully composed to mimic the quality of professional shots. A selfie, on the other hand, is usually a quick photo taken by holding your phone at arm’s length, which can distort angles and lighting.
2. Can I really take a professional self-portrait with just my phone?
Absolutely. Many smartphones today have high-resolution cameras and portrait modes that replicate DSLR-style depth. With good lighting, a stable setup, and thoughtful composition, you can capture portraits that look clean and polished.
3. What background is best for self-portraits?
Simple, uncluttered backgrounds work the best. For instance, plain walls, soft curtains, or slightly blurred environments. It is essential to avoid busy or distracting elements that could pull focus from your face.
4. How can I avoid looking stiff or awkward in my self-portraits?
The key is comfort. Use a remote shutter so you are not rushing, and experiment with different poses and expressions. Looking slightly off-camera, soft smiling, or incorporating props like a chair or desk can help you relax and appear more natural.
5. What if I do not want to set up all the gear?
If the DIY portrait approach feels overwhelming, tools like Headshot Photo are a great alternative. Just upload a clear photo, and the AI transforms it into a professional-grade headshot—no tripod, lighting setup, or editing required.
